React Native
2025-09-08
Firebase Messaging 이용해서 React Native 푸시 알림을 3번 이상 설정 후 느낀 것들 (설정 가이드, 테스트 방법)
새로운 회사를 이직하며 여러개의 프로젝트를 하다보니 이 firebase messaging 초기 설정만 3~4번은 한 것 같아요.

새로운 회사를 이직하며 여러개의 프로젝트를 하다보니 이 firebase messaging 초기 설정만 3~4번은 한 것 같아요.
이렇게 많이 설정 하다보니 느낀건 생각보다 정말 어렵지 않다입니다.! 중간중간 발생하는 버그들도 작성해 두었으니 문제가 생기면 꼭 확인해주세용
react-native에 이 Firebase Cloud Messaging 서비스를 추가하려고 하면 최대한 이 글 하나만 보면 구현할 수 있게 정리해 놓으려고 합니당
그럼 바로 시작!
firebase console, ios developer 설정
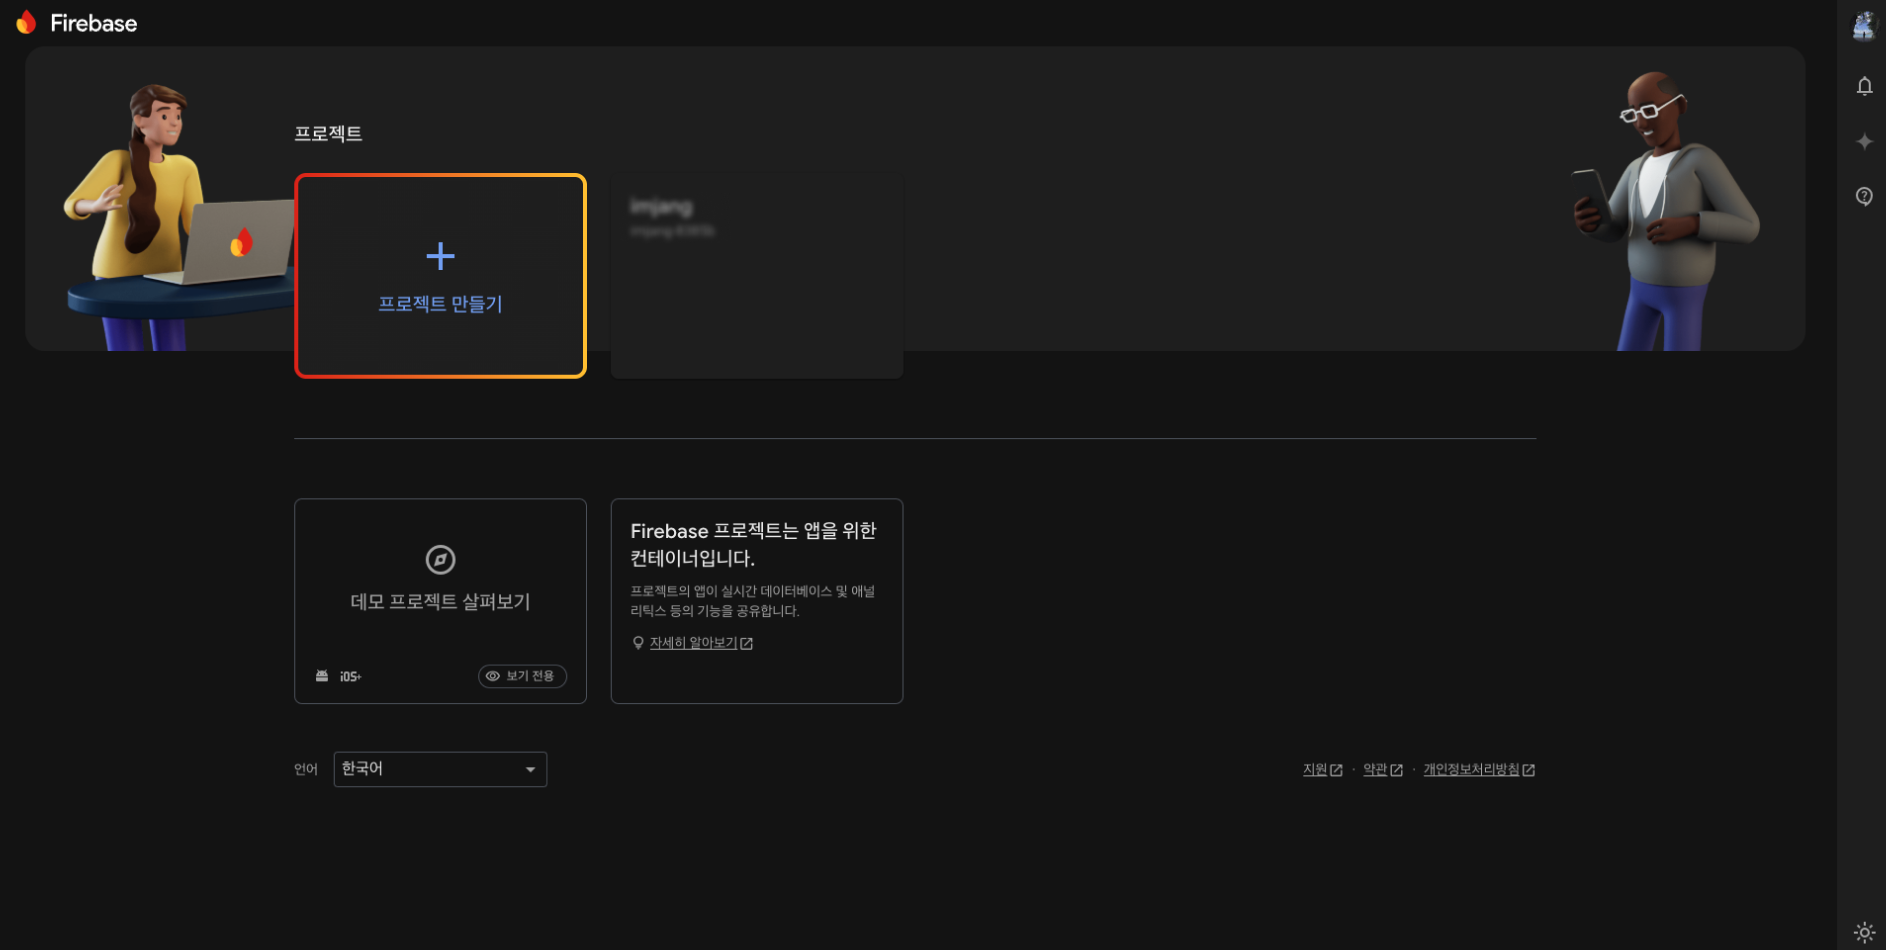
먼저 firebase console에 접속해서 새로운 프로젝트를 생성합니다. 이미 만들어져 있는 경우 이 부분은 패스!
이건 react-native를 떠나서 firebase messaging을 사용하려면 필수적인 설정입니다.
프로젝트 생성
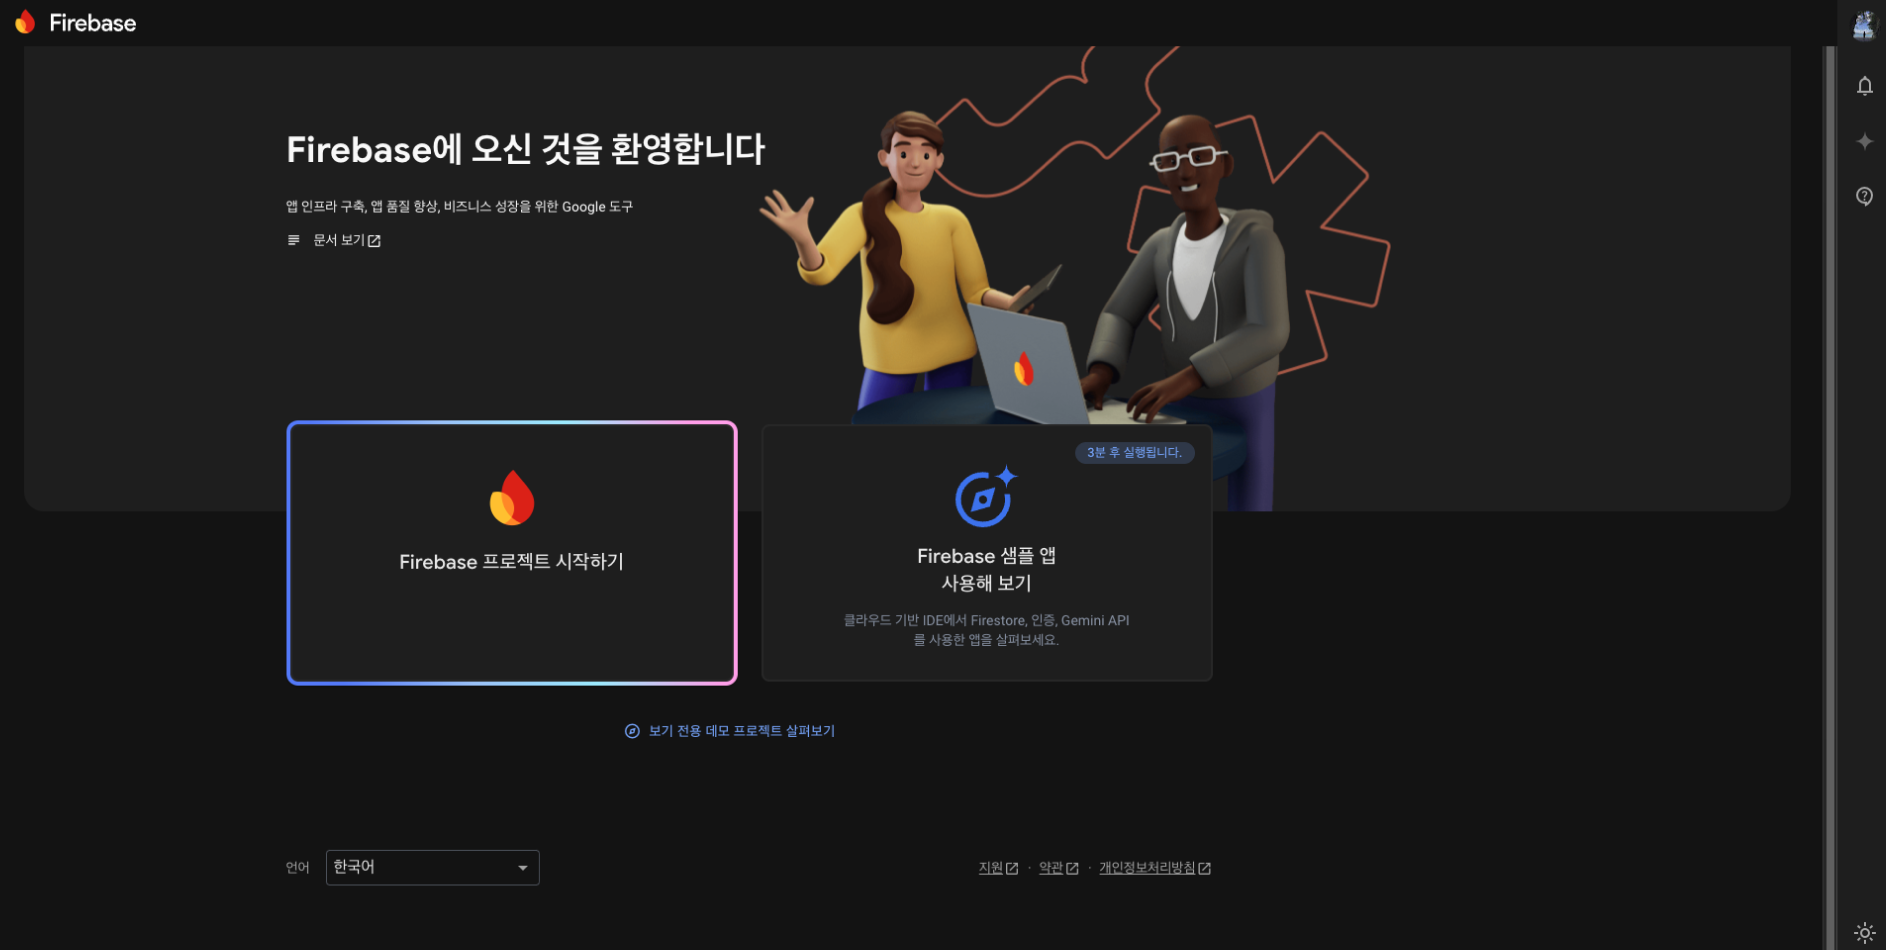
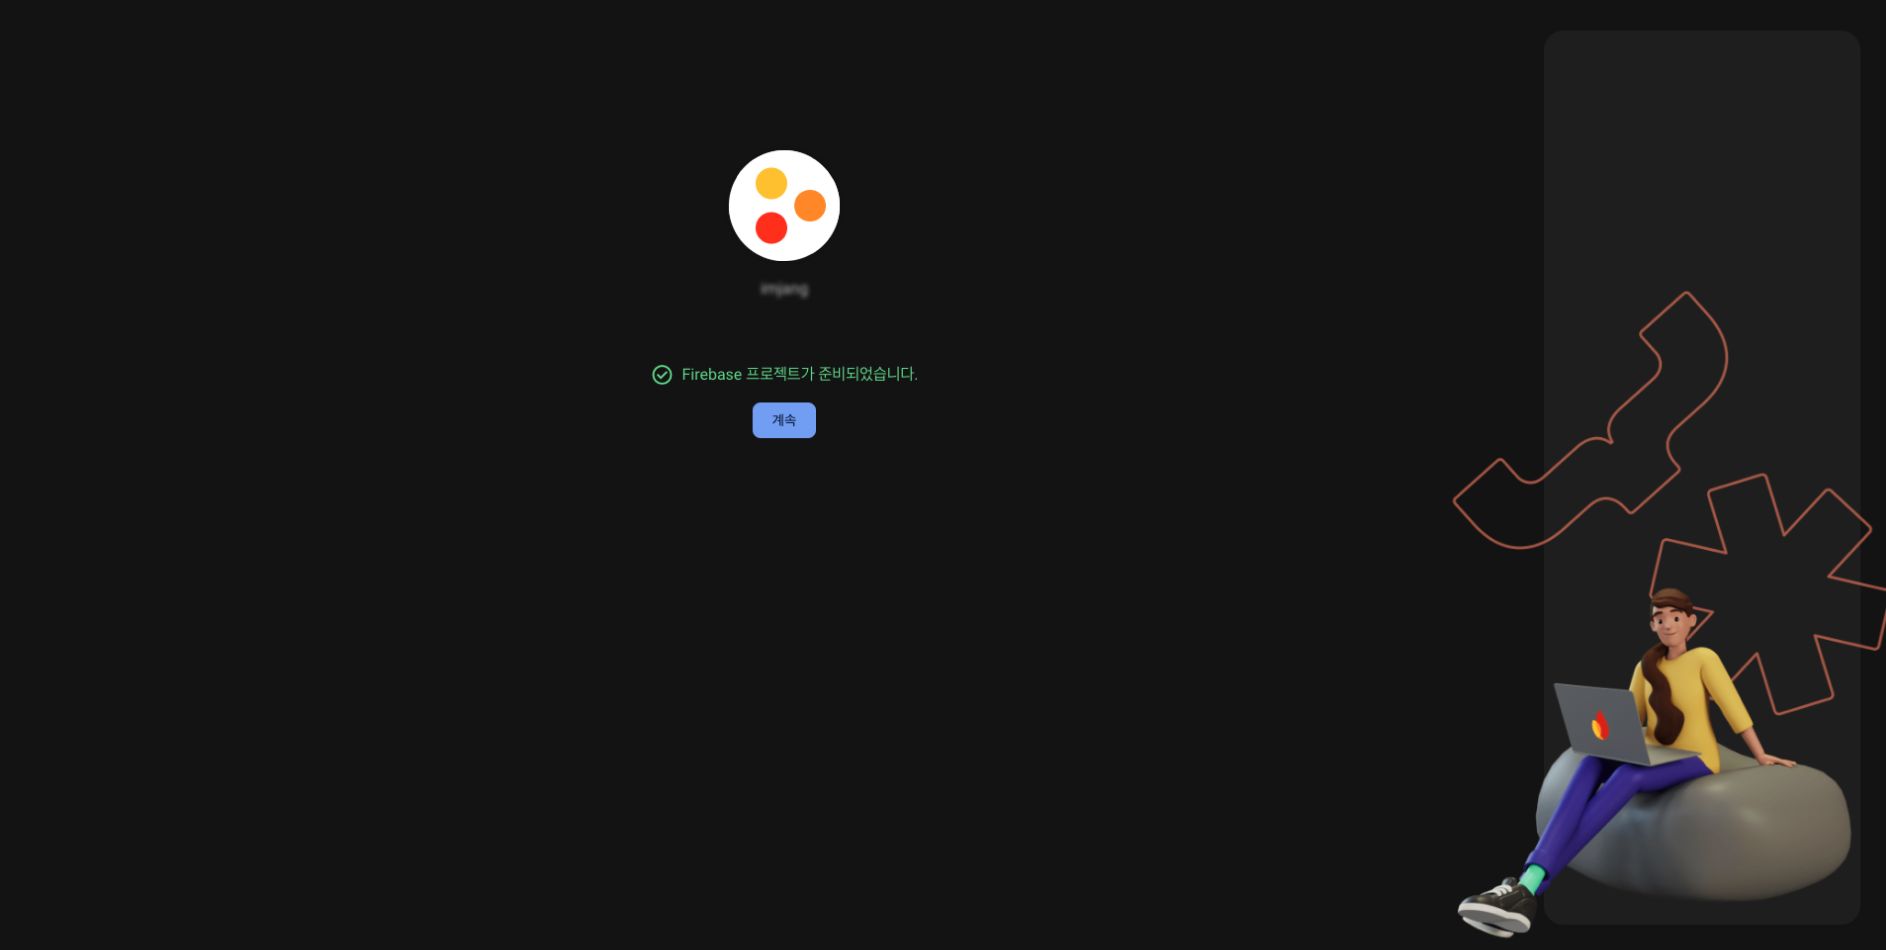
파이어베이스 콘솔에 들어가면 처음 보이는 화면이에요.
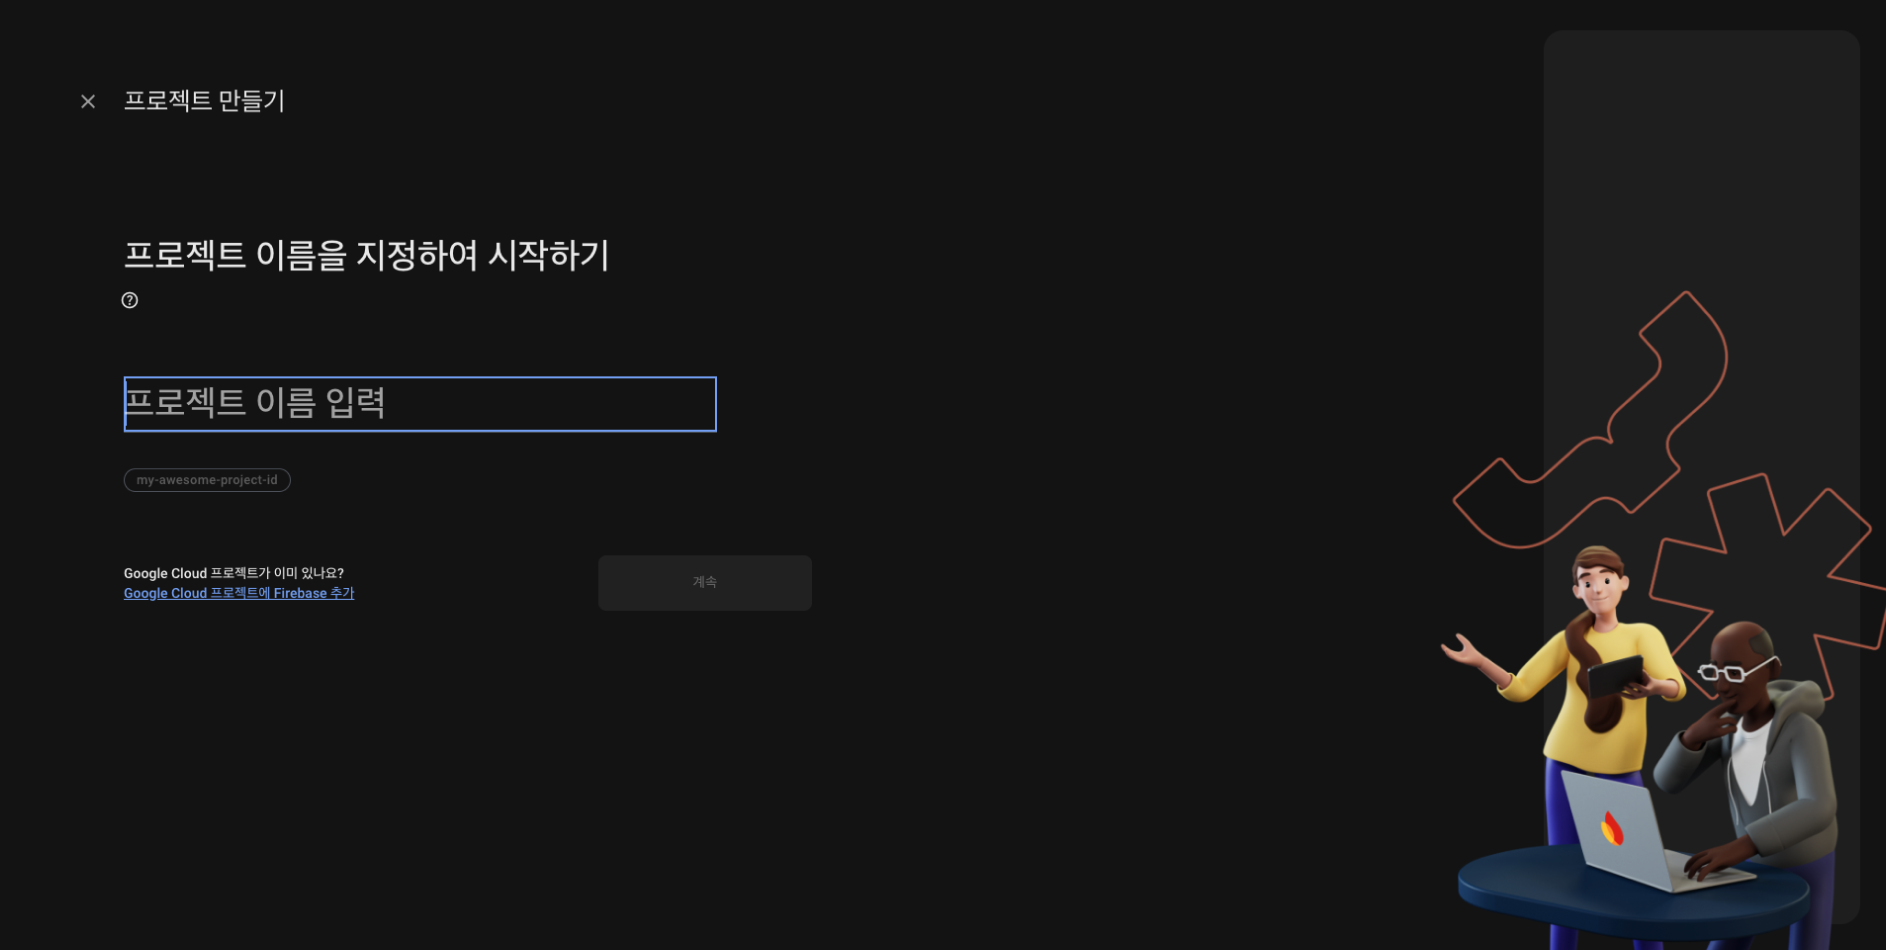
프로젝트 이름을 입력해 줍니다.
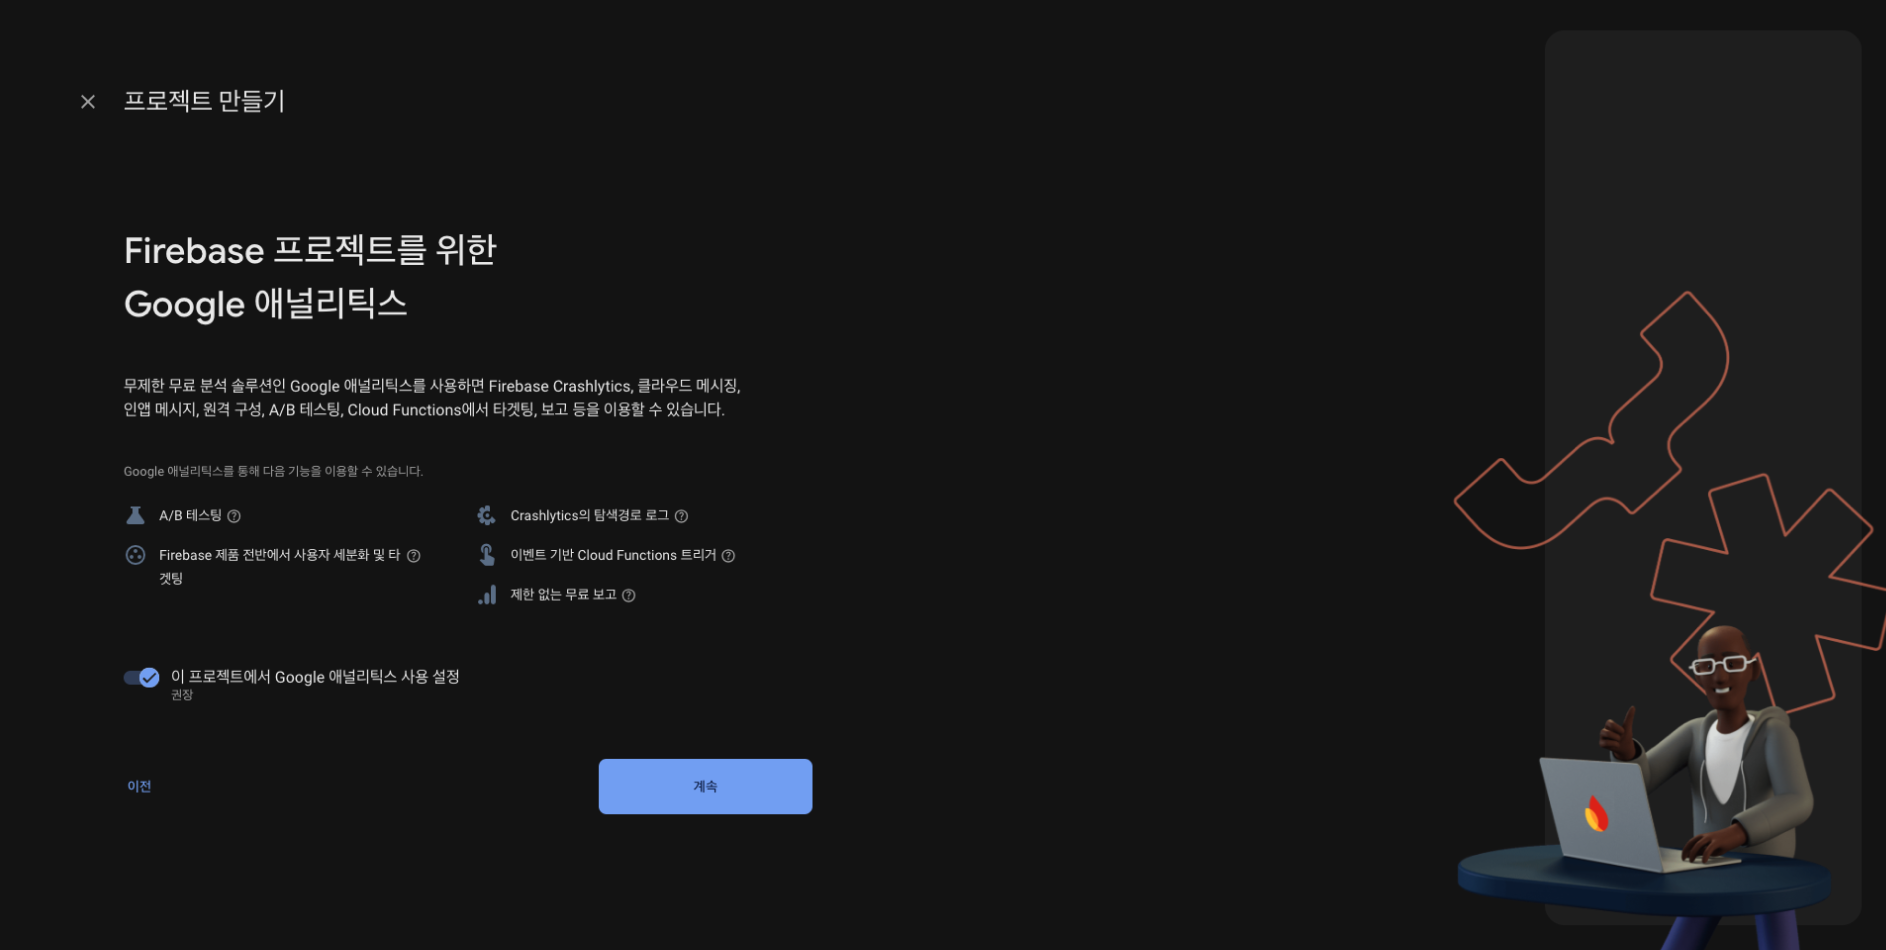
애널리틱스(로그 이벤트 추적 서비스)은 개인의 선택이니 해도 되고 안해도 상관 없어요.
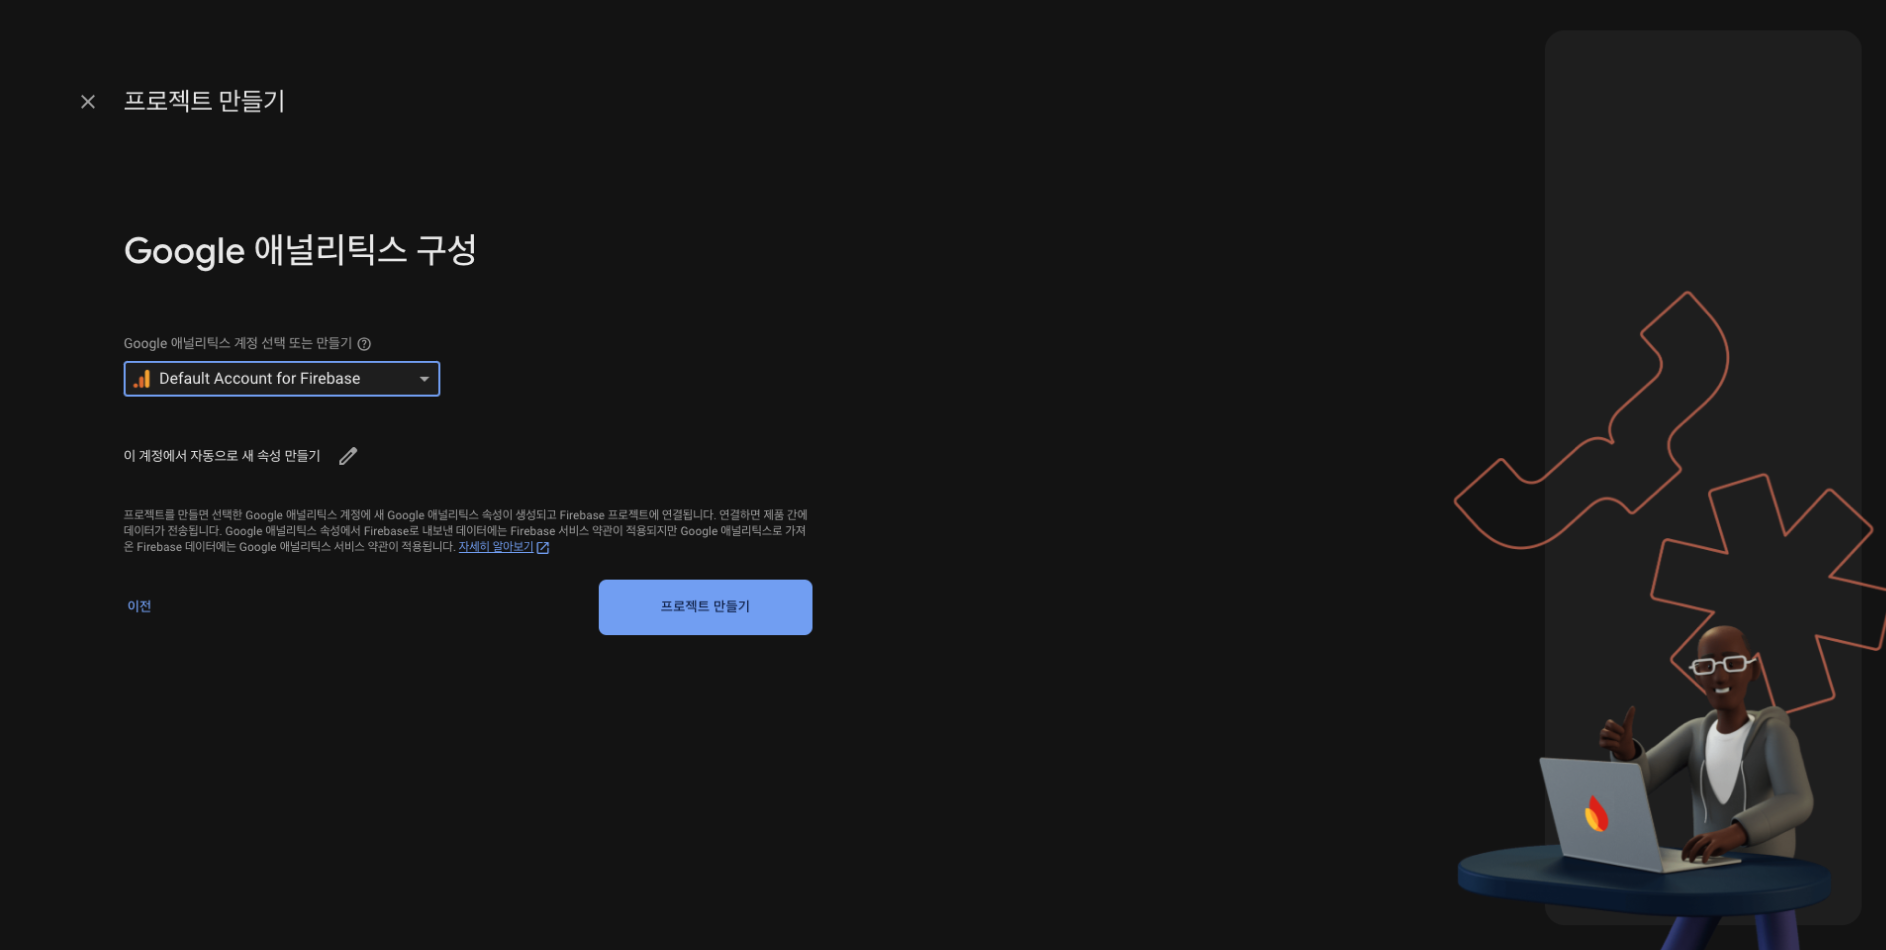
마지막으로 프로젝트 만들기 클릭

프로젝트 만드는데 약간 기다려주면, 내가 만든 프로젝트 이름대로 생성이 됩니다.
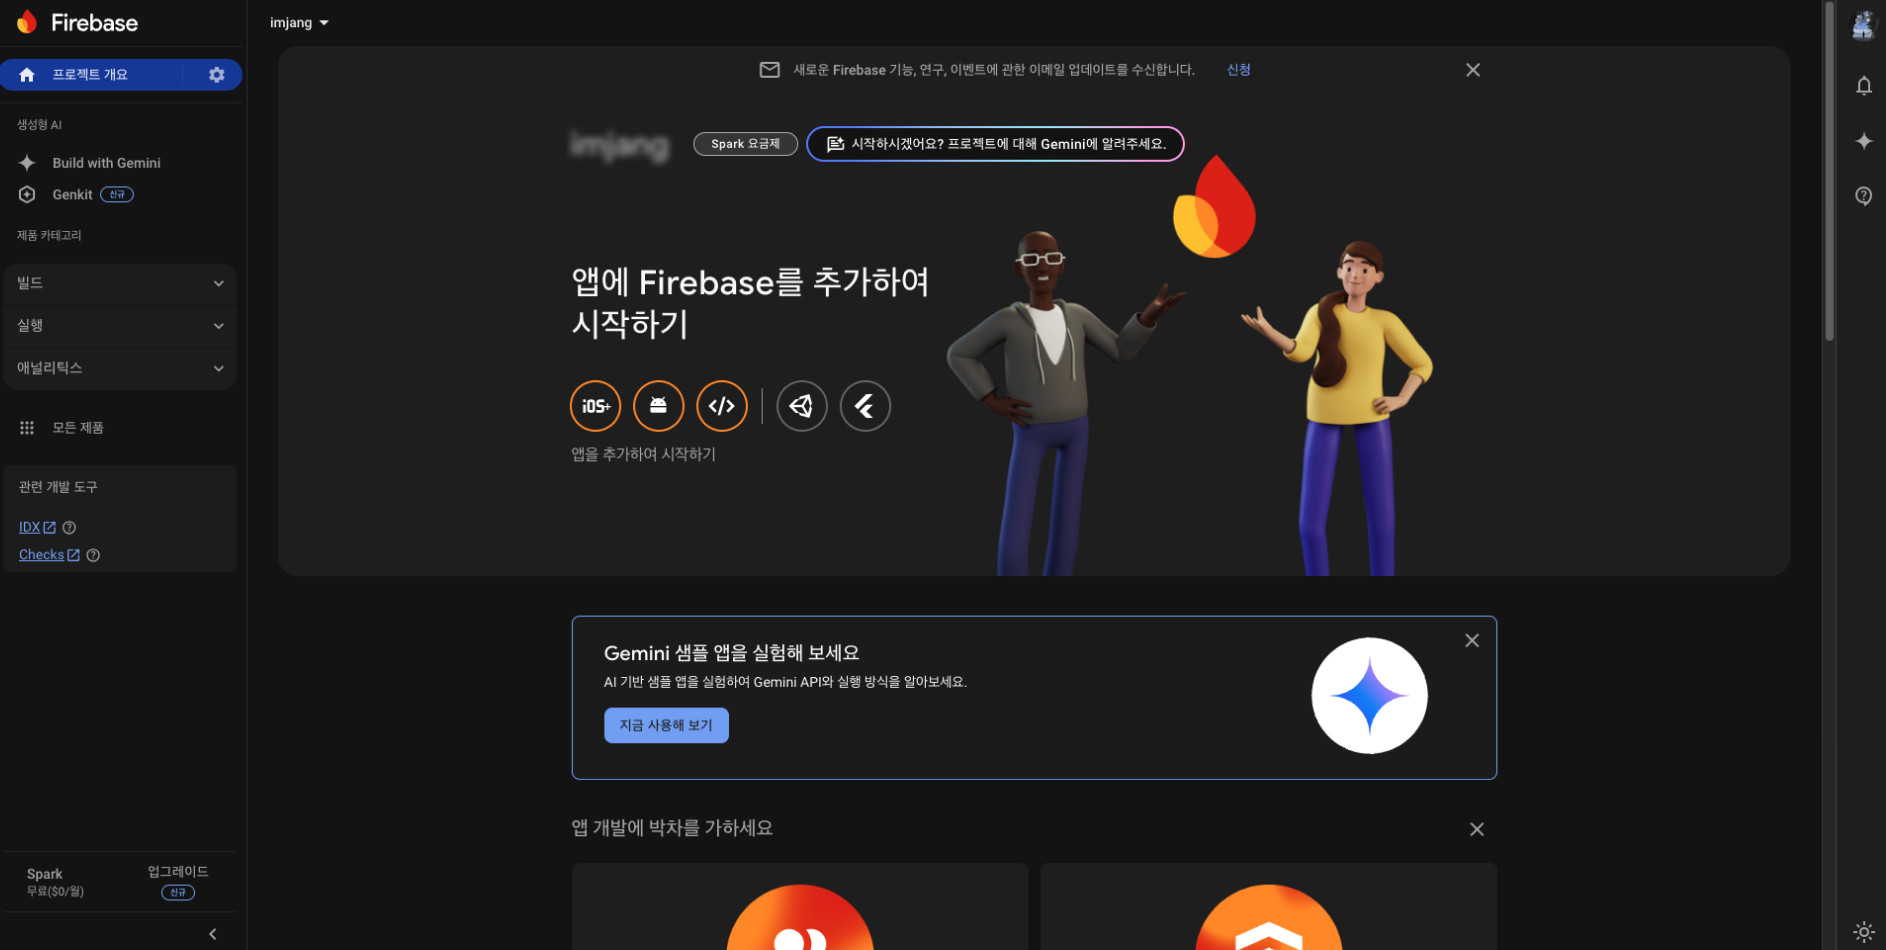
만들어진 프로젝트를 클릭해서 들어가면 이렇게 대시보드가 나옵니다.
ios 설정
위 대시보드에서 ios 앱을 추가하여 시작하기 버튼을 클릭합니다.

다음 버튼을 누르면 나의 apple 번들 id를 입력하는 부분이 나옵니다.
번들 id는 apple store에 들어가셔서, 내가 만든 나의 앱의 번들 ID를 입력해 줍니다.
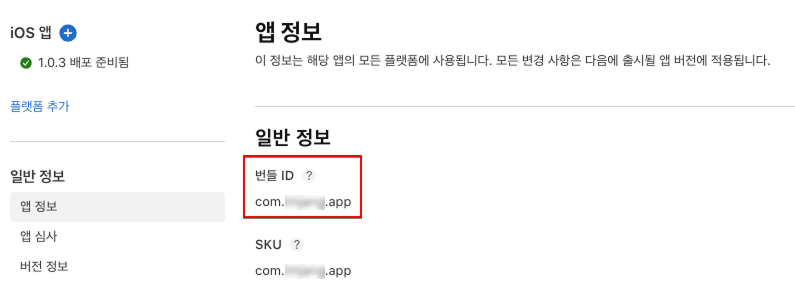
보통 com.myproject.app 이런 형식이겠죠?
 위
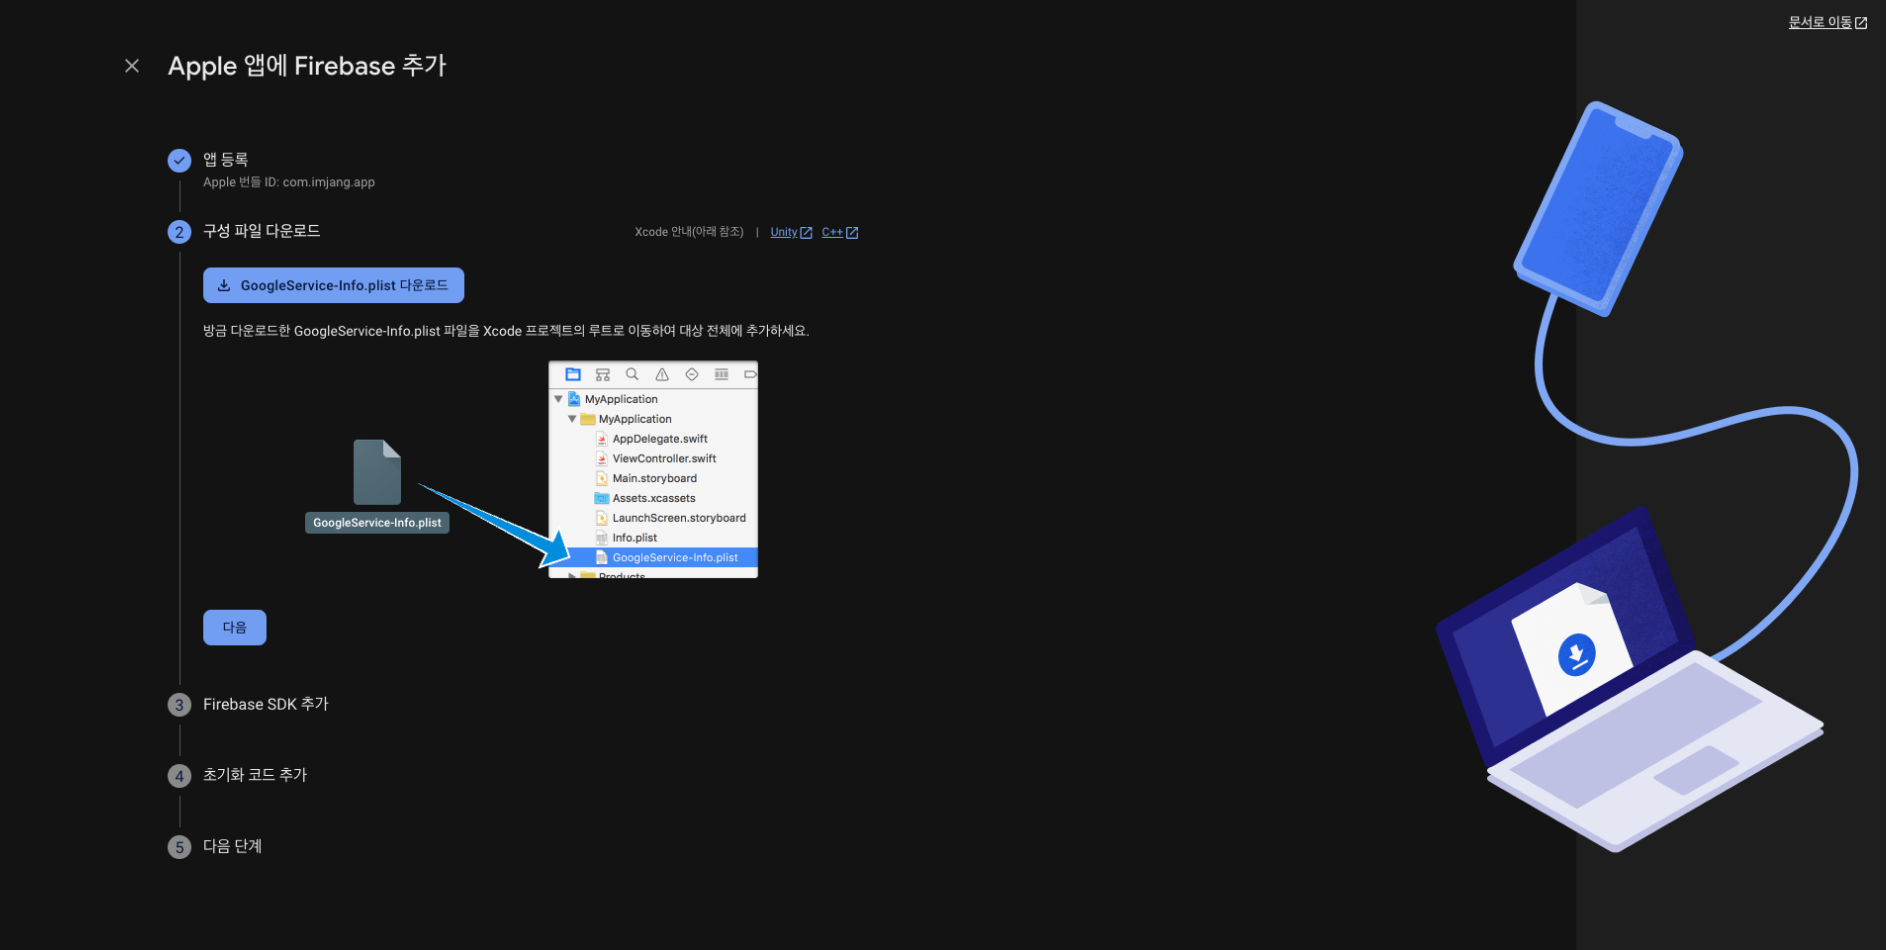
위 GoogleService-Info.plist 파일을 다운로드 해줍니다.
그리고 위 설명처럼 꼭 Xcode를 통해 구성 파일을 추가해주세요. 프로젝트 폴더에 그냥 파일을 추가할 경우, Xcode에서 인식이 안 될 수 있습니다.
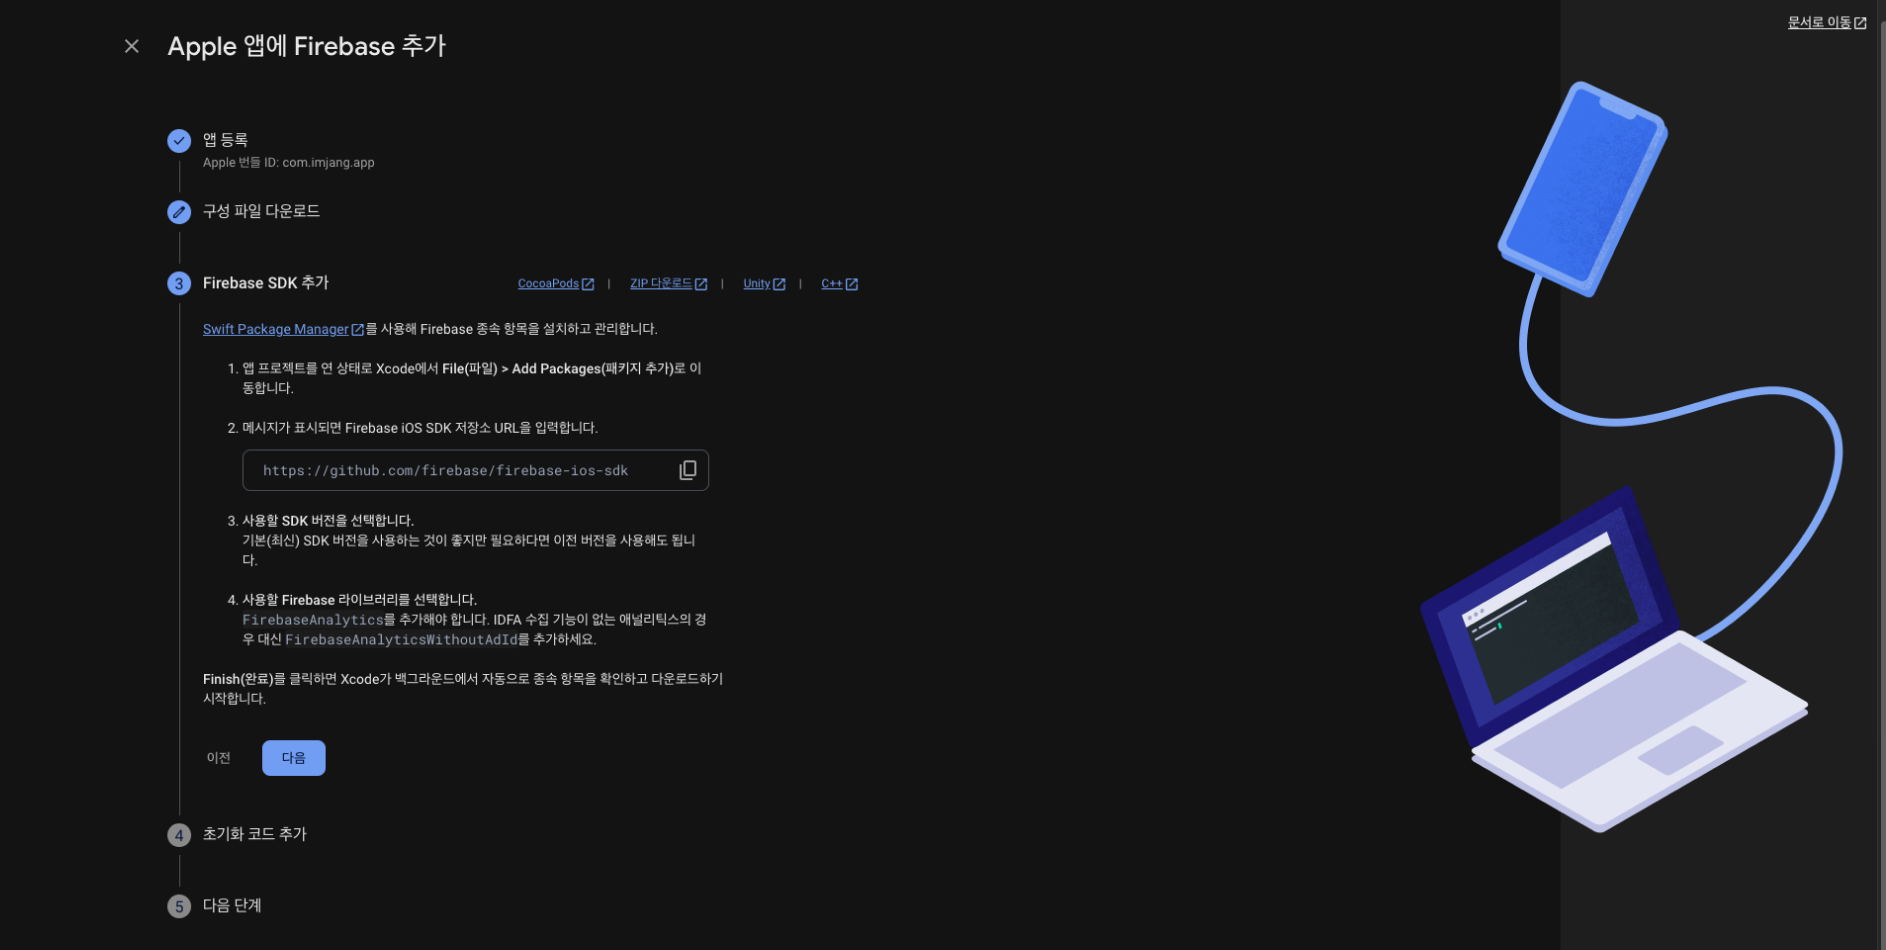
firebase messaging을 사용하려면 sdk 설정과 초기화 코드 추가 필요한데 이 부분은 아래에 적어두었습니다.
그렇게 ios 앱 추가를 완료해줍니다.
- 프로젝트 설정 > 일반
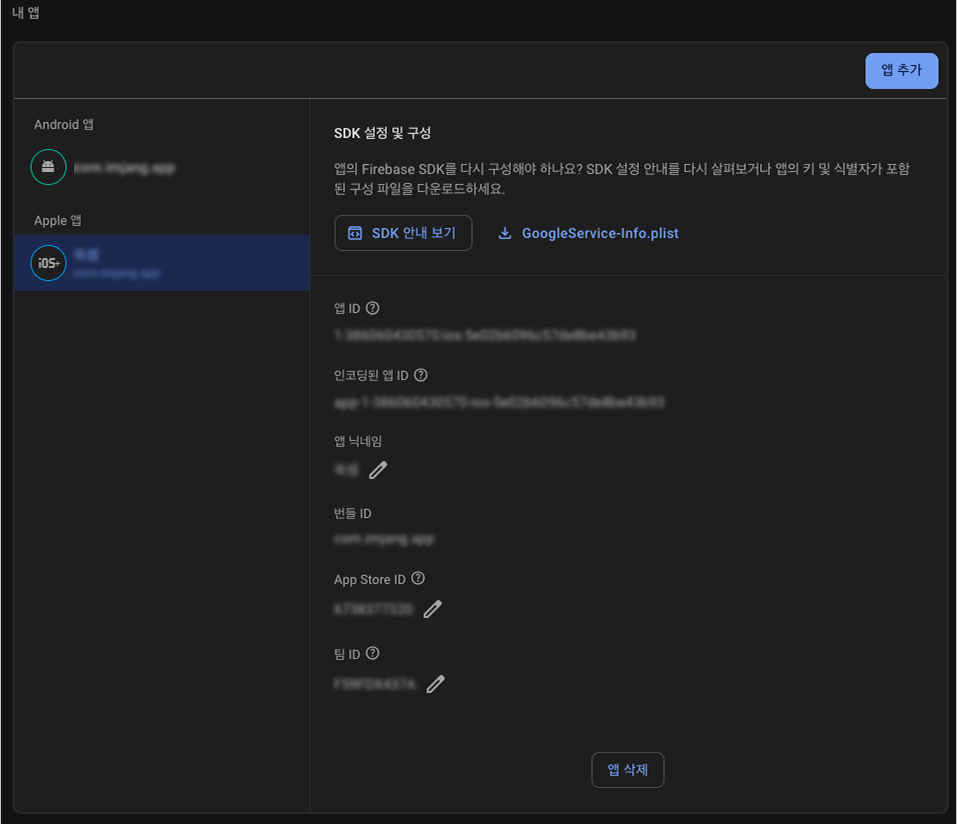
그렇게 프로젝트 설정 > 일반에 들어가보면 생성이 된 Appple 앱을 확인할 수 있습니다.
- APNs 설정, key 다운로드
다음으로 중요한 apple APNs 설정과 key 설정하는 방법입니다.
이 과정은 firebase에 apple 앱을 매칭시켜주는 일종의 검증 과정이에요.
apple developer 내 keys에 접속해 줍니다.
https://developer.apple.com/account/resources/authkeys/list
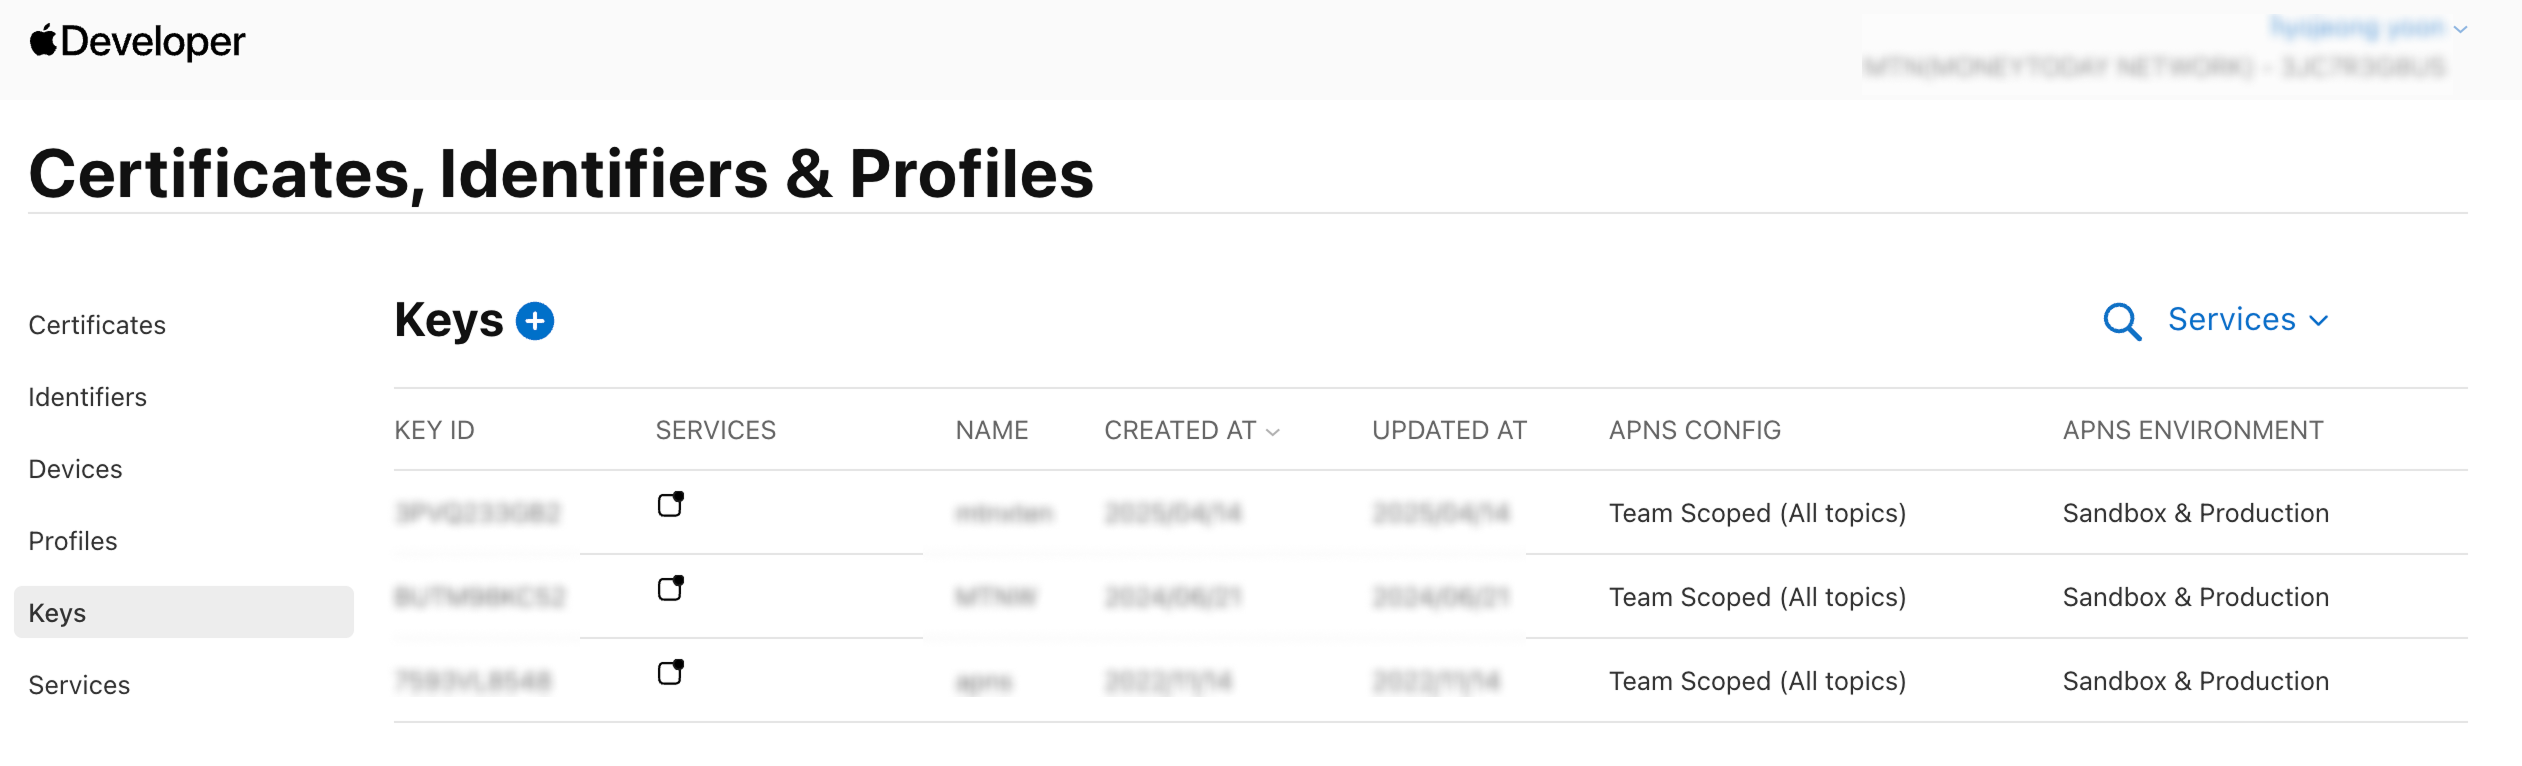
이미 설정된 것들이 보이죠?
완료된 예시입니다.
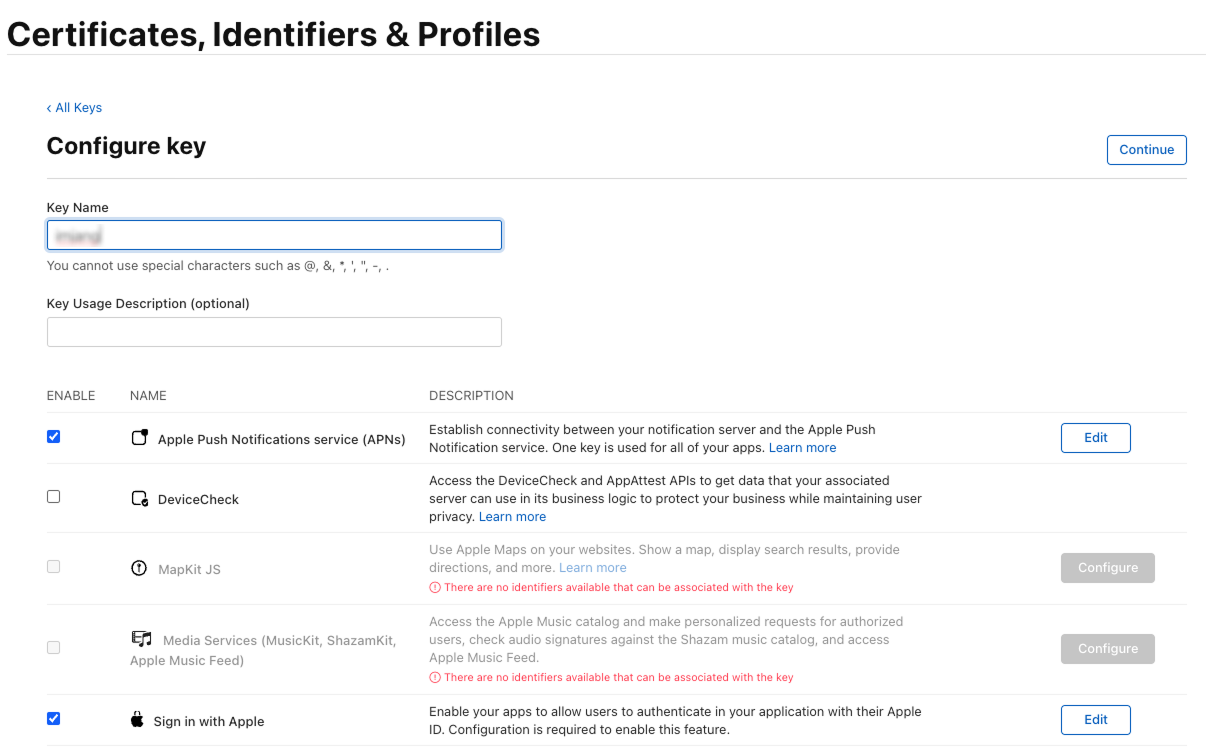
이미 설정한 모습인데요. apple 로그인은 필수가 아니니 신경 안쓰셔도 됩니다.
위 APNs 설정은 위와 같이 해주시면 됩니다.
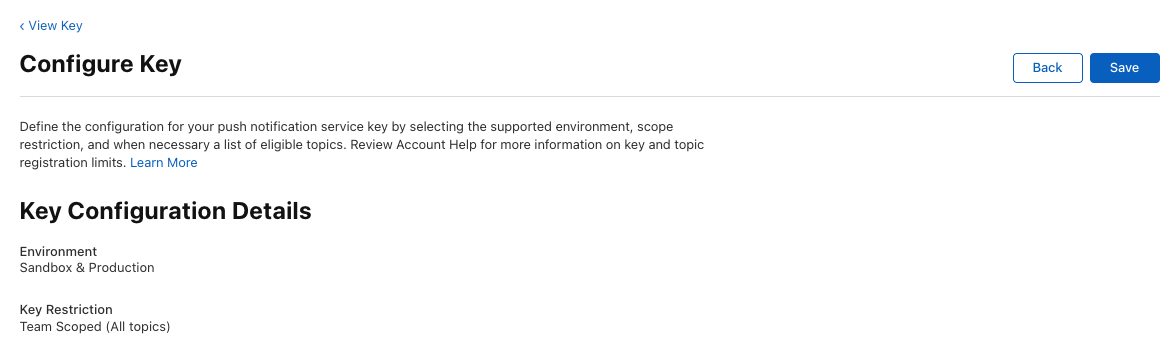
개발계, 운영계가 있어도 APNS ENVIRONMENT는 Sandbox & Production으로 선택해 주어야 합니다. 개발계/운영계 각각 keys를 만들면 돼요.
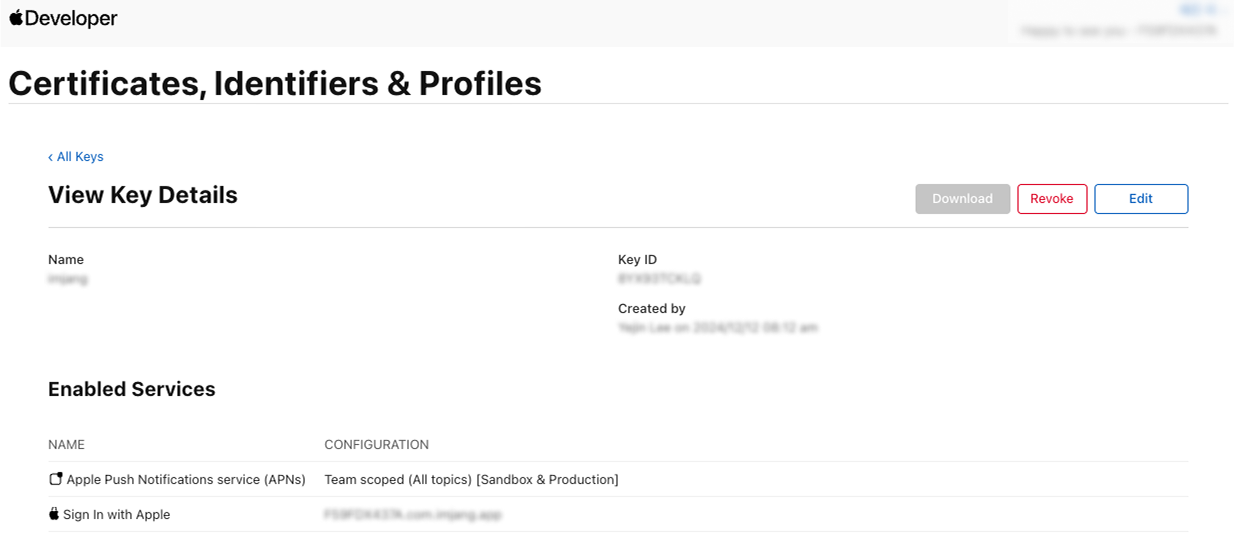
최종 화면인데 key는 한번밖에 다운이 되지 않으니 꼭 주의해주세요!
키 파일 예시: AuthKey_1Q1W2E3R4.p8
- 프로젝트 설정 > 클라우드 메시징
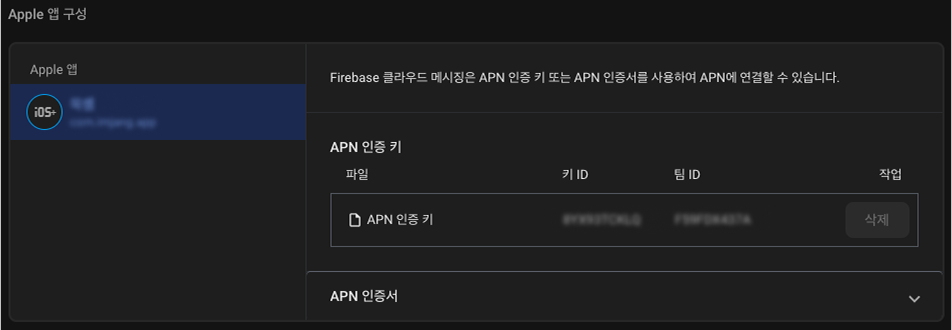
그렇게 apple developer에서 다운받은 key를 firebase에 추가해줍니다.
android 설정
다음으로 android 설정을 해볼게요.
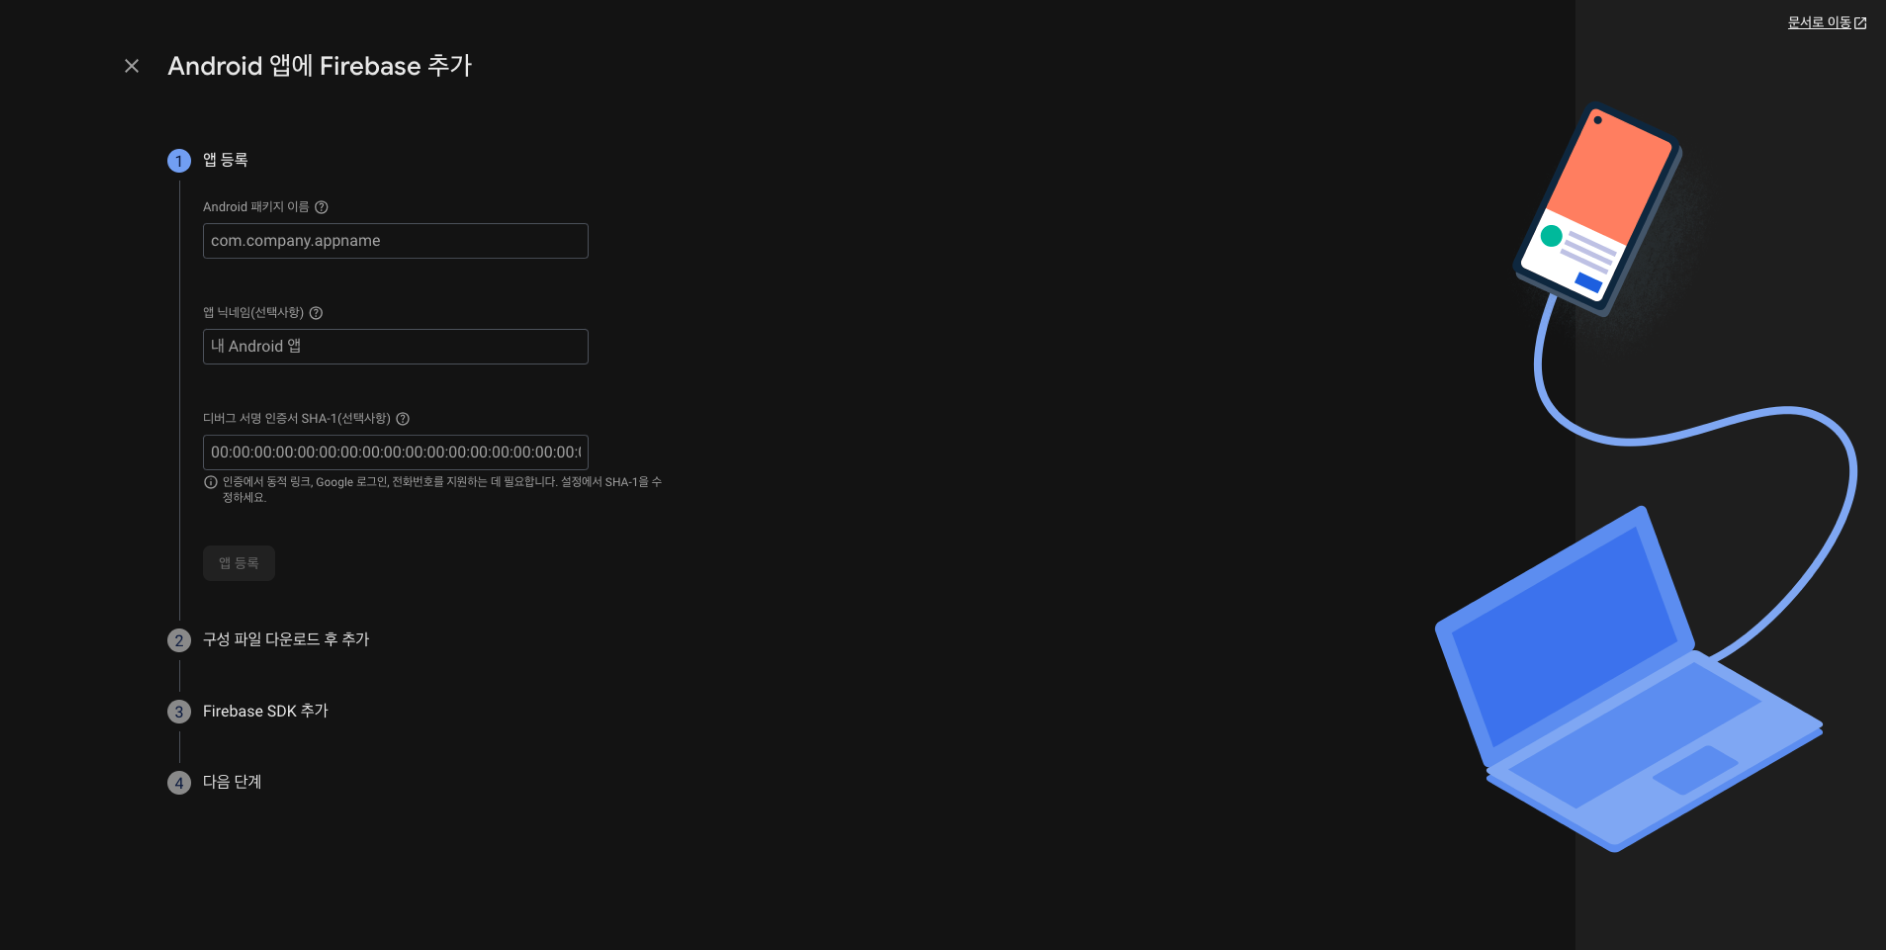
ios와 동일하게 android 앱을 추가하여 시작하기 버튼을 클릭하여 생성해줍니다.
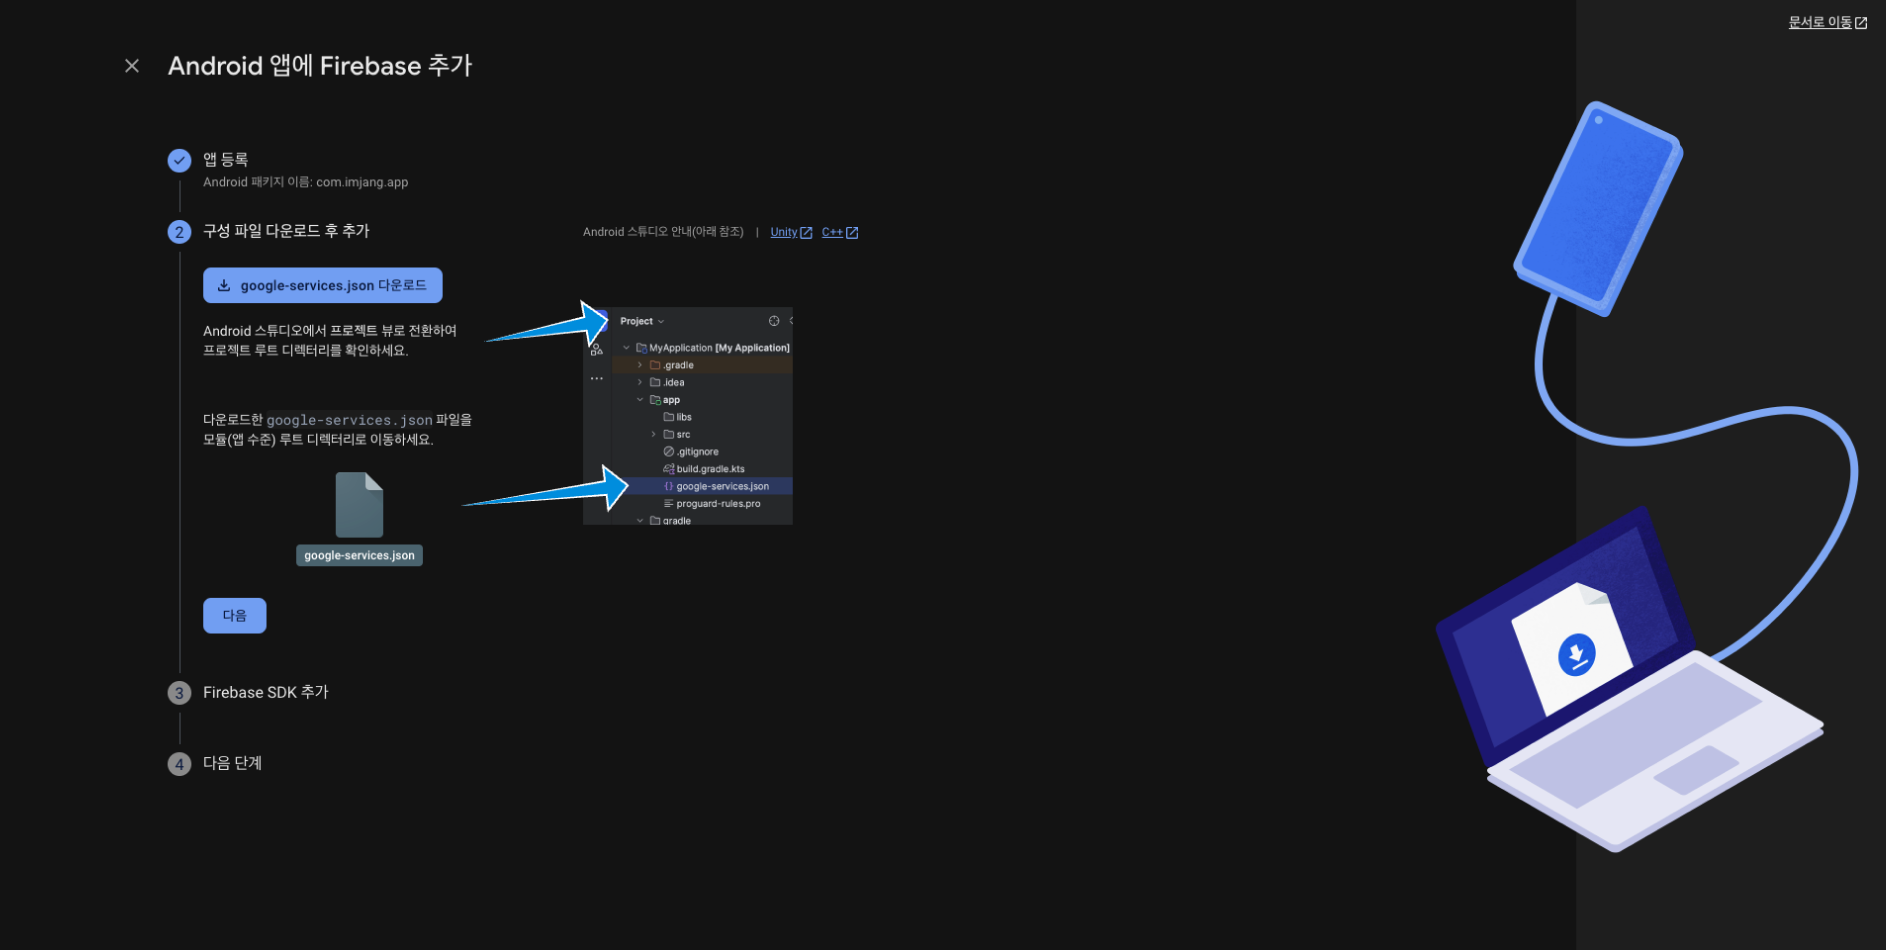
여기선 google-services.json 파일을 다운로드 해줍니다.
이 또한 설명대로 파일을 프로젝트에 추가해 줍니다. (아래에 설명도 적어두었어요.)
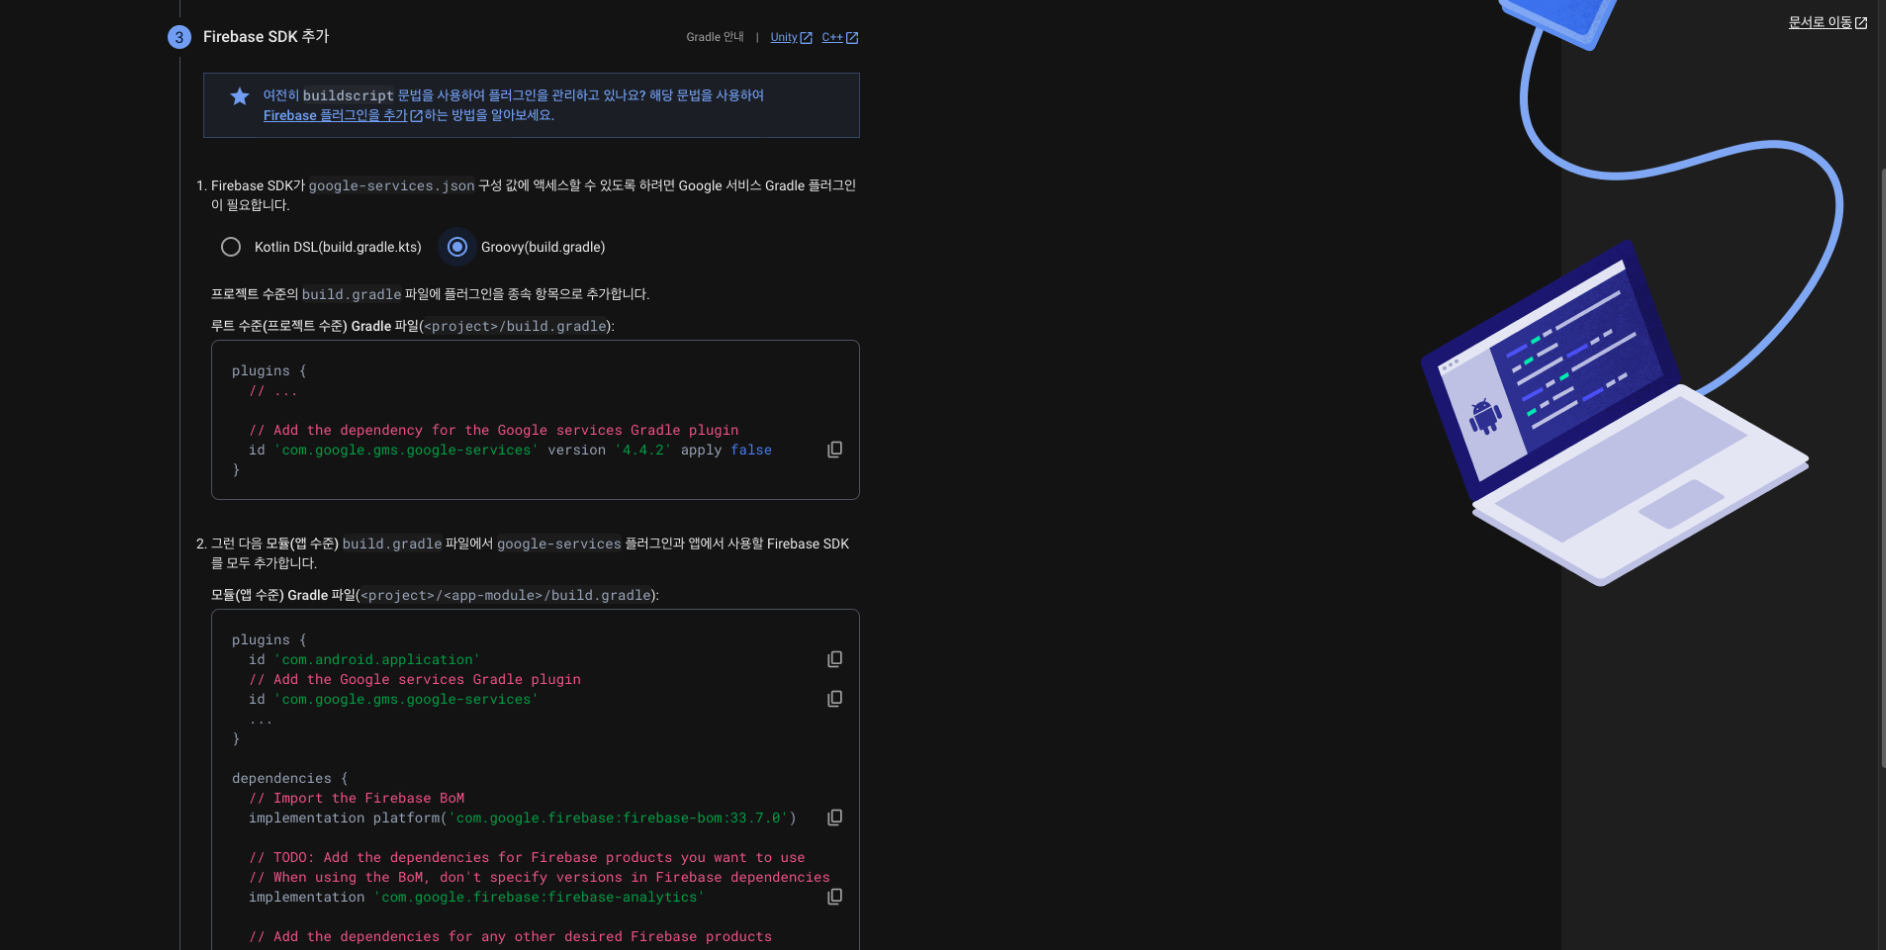
android도 ios와 동일하게 adk 설정을 해주어야 합니다.
위 설명대로 따라하셔도 되고, 아래 제 코드대로 해보셔도 됩니다.
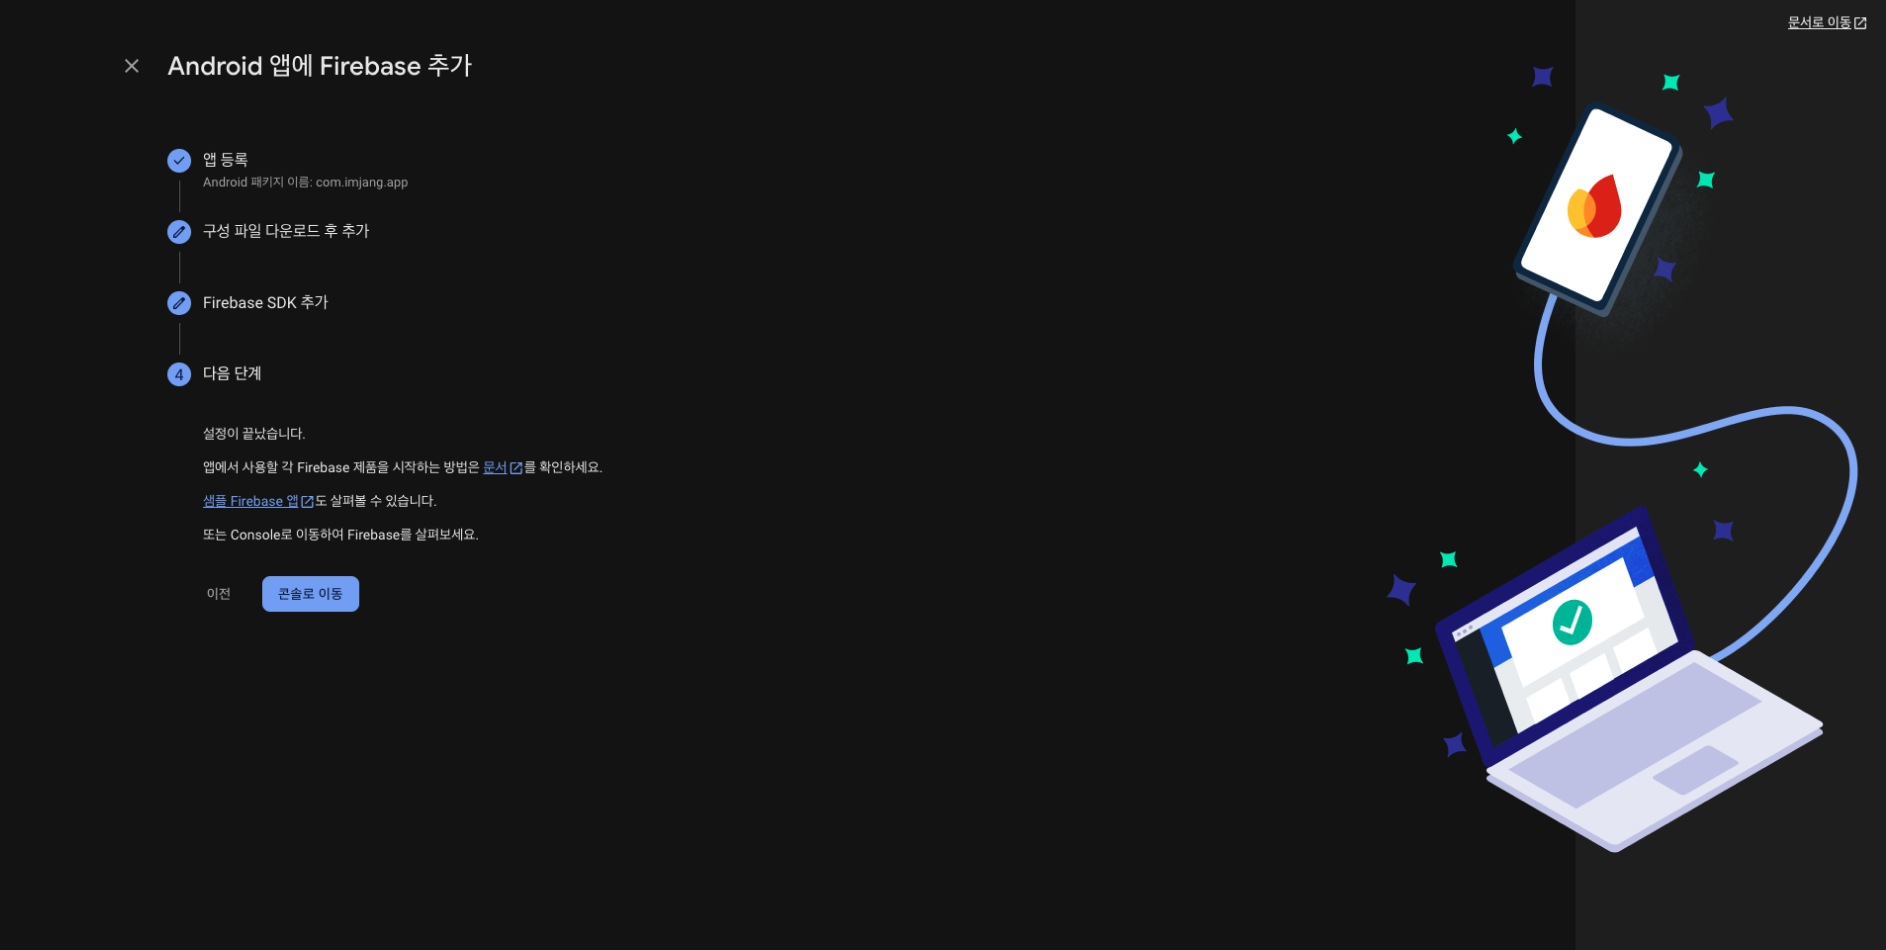
내용 확인 후 android 앱 추가를 완료해줍니다.
APP 설정
firebase 설정을 완료했으면, 이제 나의 app에 위 설정 파일들을 추가해줍니다.
ios 설정
- Xcode > GoogleService-Info.plist 파일 추가
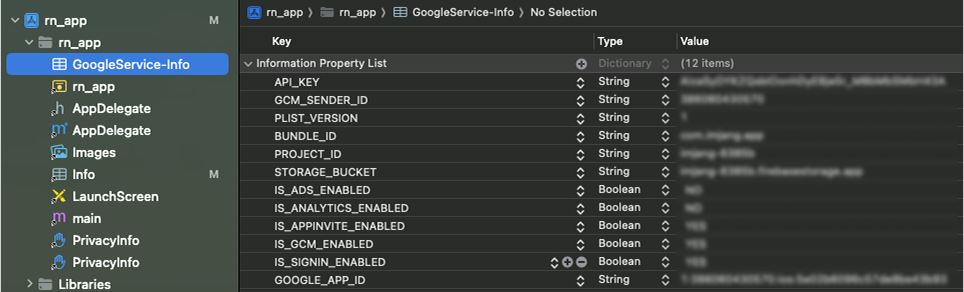
{myProject}/ios/{myProject} 폴더 위치 내에 firebase에서 다운 받은 GoogleService-Info.plist 파일을 추가해줍니다.
사진처럼 Xcode에서 파일 추가를 해야 인식을 합니다. 클릭하면 위와 같이 보입니다.
- Xcode > Background Modes, Push Notifications 추가
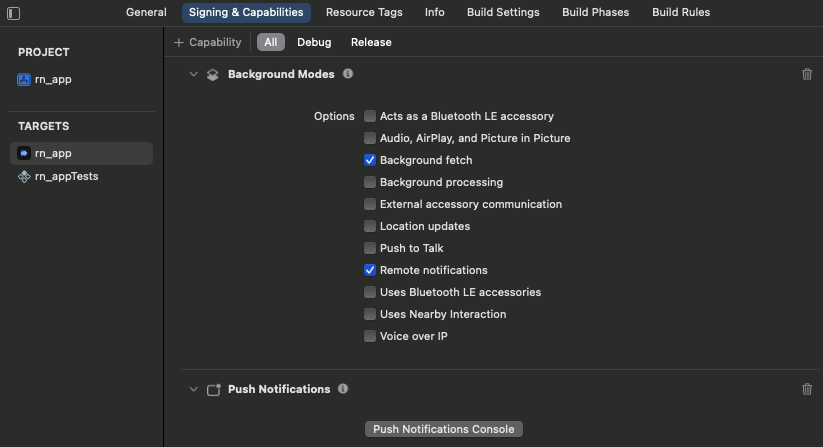
위 사진처럼 Xcode에서 Background Modes, Push Notifications 기능 추가가 필요합니다.
-
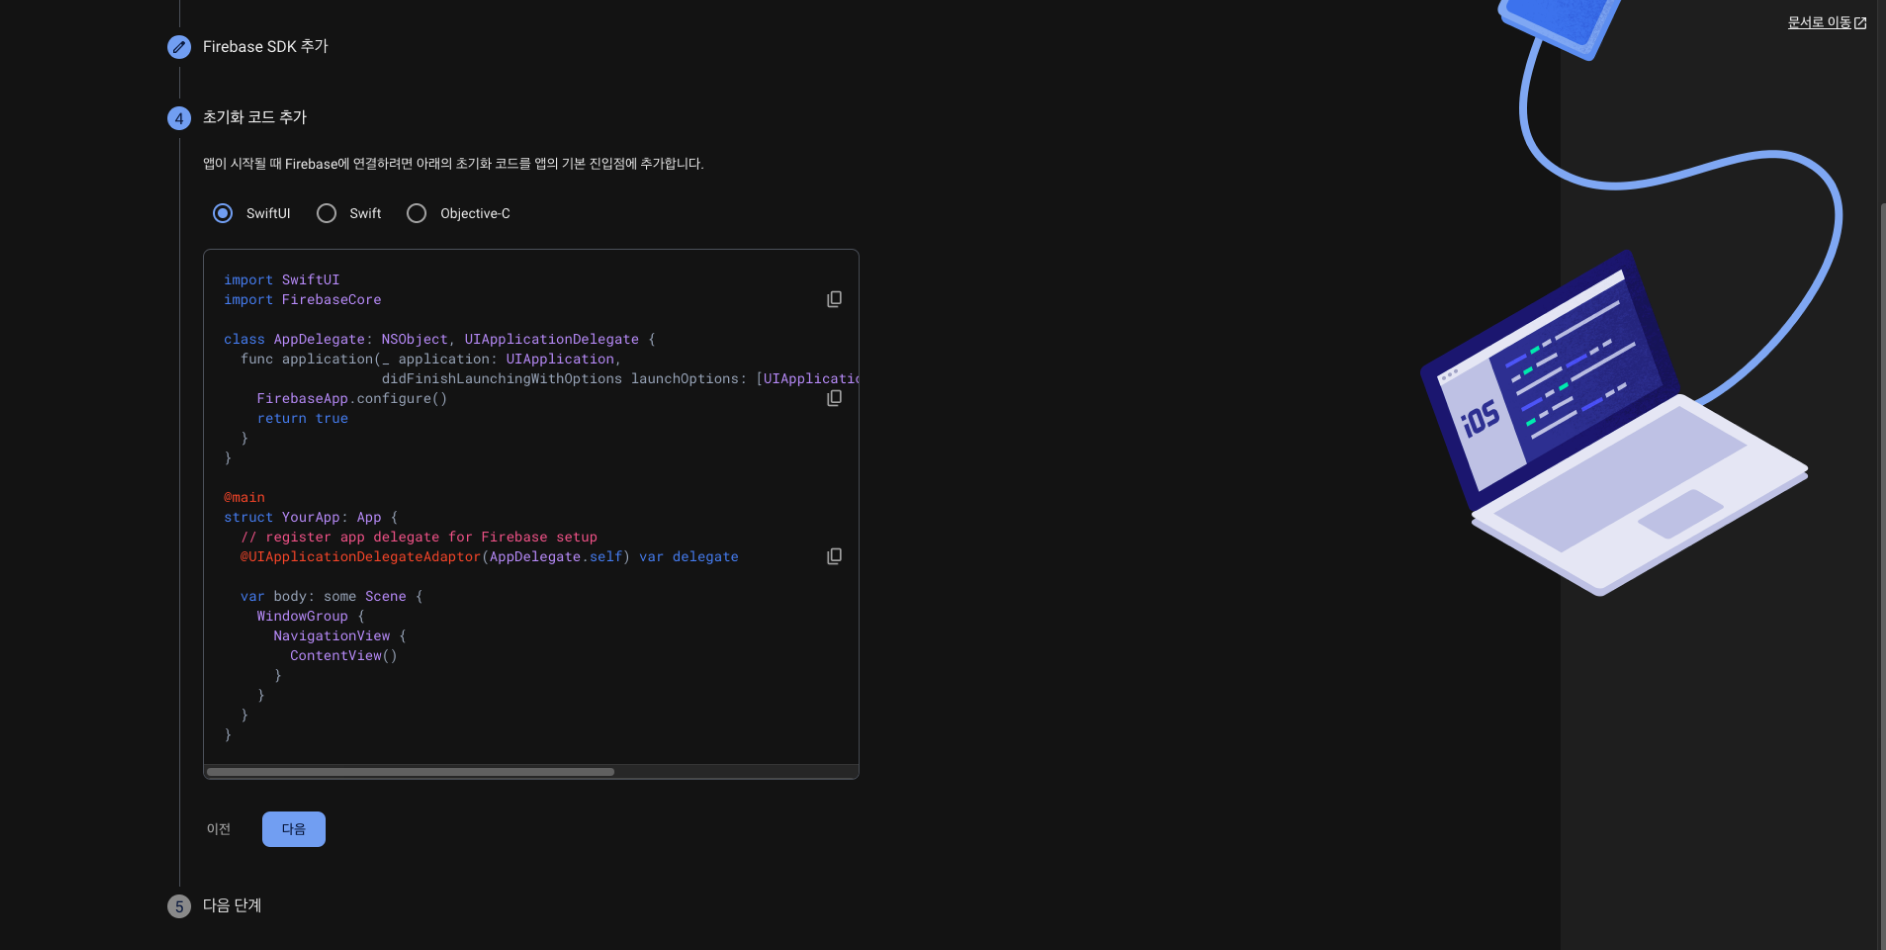
ios/{project}/AppDelegate.mm또는AppDelegate.swift에 firebase 초기 설정 코드 추가objective-c일 경우 아래처럼 작성해주고,
// ios/{project}/AppDelegate.mm

#import <Firebase.h> // 추가

@implementation AppDelegate

- (BOOL)application:(UIApplication *)application didFinishLaunchingWithOptions:(NSDictionary *)launchOptions
{
  self.moduleName = @"rn_app";
  self.initialProps = @{};

  if ([FIRApp defaultApp] == nil) { // 추가
    [FIRApp configure]; // 추가
  } // 추가

  return [super application:application didFinishLaunchingWithOptions:launchOptions];
  [RNSplashScreen show];
  return YES;
}
swift일 경우 아래처럼 설정해 줍니다.
// ios/{project}/AppDelegate.swift import Firebase // 추가 @main class AppDelegate: UIResponder, UIApplicationDelegate { var window: UIWindow? var reactNativeDelegate: ReactNativeDelegate? var reactNativeFactory: RCTReactNativeFactory? func application( _ application: UIApplication, didFinishLaunchingWithOptions launchOptions: [UIApplication.LaunchOptionsKey: Any]? = nil ) -> Bool { let delegate = ReactNativeDelegate() let factory = RCTReactNativeFactory(delegate: delegate) delegate.dependencyProvider = RCTAppDependencyProvider() reactNativeDelegate = delegate reactNativeFactory = factory // Configure Firebase if FirebaseApp.app() == nil { // 추가 FirebaseApp.configure() // 추가 } // 추가 -
만약 pod install 에러 발생 시, ios/Podfile에 아래 코드를 작성해 줍니다.
if linkage != nil
  Pod::UI.puts "Configuring Pod with #{linkage}ally linked Frameworks".green
  use_frameworks! :linkage => linkage.to_sym
else // 추가
  use_frameworks! :linkage => :static // 추가
  $RNFirebaseAsStaticFramework = true // 추가
end

target 'rn_app' do
  config = use_native_modules!

  use_react_native!(
    :path => config[:reactNativePath],
    # An absolute path to your application root.
    :app_path => "#{Pod::Config.instance.installation_root}/.."
  )

  pod 'Firebase/Core' // 필수 아닌듯
  pod 'Firebase/Messaging' // 필수 아닌듯
에러 발견 기록
-
npm i @react-native-firebase/app @react-native-firebase/messaging설치 후pod install에러→
The Swift pod FirebaseCoreInternal depends upon GoogleUtilities, which does not define modules.위와 같은 에러 발생 시, Podfile에 아래 코드를 추가해 줍니다.
// ios/Podfile if linkage != nil Pod::UI.puts "Configuring Pod with #{linkage}ally linked Frameworks".green use_frameworks! :linkage => linkage.to_sym else // 추가 use_frameworks! :linkage => :static // 추가 $RNFirebaseAsStaticFramework = true // 추가 end -
build 시 에러
[runtime not ready]: Error: No Firebase App '[DEFAULT]' has been created - call firebase.initializeApp()위와 같은 에러 발생 시,
ios/{project}/AppDelegate.mm파일에 firebase config 설정을 추가해 줍니다.#import <Firebase.h> // 추가 @implementation AppDelegate - (BOOL)application:(UIApplication _)application didFinishLaunchingWithOptions:(NSDictionary _)launchOptions { self.moduleName = @"rn_app"; self.initialProps = @{}; if ([FIRApp defaultApp] == nil) { // 추가 [FIRApp configure]; // 추가 } // 추가 return [super application:application didFinishLaunchingWithOptions:launchOptions]; [RNSplashScreen show]; return YES; }
android 설정
- android/app/google-services.json 파일 추가
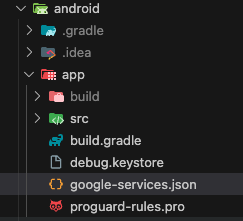
프로젝트명/android/app 폴더 위치 내에 firebase에서 다운 받은 google-services.json 파일을 추가해줍니다.
-
android/build.gradle
dependencies {
		classpath("com.android.tools.build:gradle")
		classpath("com.facebook.react:react-native-gradle-plugin")
		classpath("org.jetbrains.kotlin:kotlin-gradle-plugin")
		classpath("com.google.gms:google-services:4.4.2") // 추가
}
firebase android sdk를 android/build.gradle 내에 위와 같이 추가해 줍니다.
-
android/app/build.gradle
// apply plugin 하단
apply plugin: "com.google.gms.google-services" // 추가
동일하게 android/app/build.gradle 내에 위와 같이 firebase android sdk를 추가해 줍니다.
- 에러 발견 기록
-
위 build.gradle 추가 후 sync 시,
CMake Error at /android/app/build/generated/autolinking/src/main/jni/Android-autolinking.cmake:10 (add_subdirectory)→
npx react-native codegen실행 후, android/gradle.properties >newArchEnabled값 false로 변경// android/gradle.properties newArchEnabled=true // 변경 후 newArchEnabled=false // 변경 전
react native 설정
아래와 같이 푸시 토큰 가져오기, 알림 권한 요청, 알림 수신 설정을 받기 위한 react native 코드를 작성해 줍니다.
/* firebaseMessaging.ts */
import { getApp } from '@react-native-firebase/app';
import {
	AuthorizationStatus,
	getMessaging,
	getToken,
	onMessage,
	requestPermission,
	setBackgroundMessageHandler,
} from '@react-native-firebase/messaging';

import Notification from '@/components/Notification';

const messaging = getMessaging(getApp());

// FCM 토큰 가져오기
export const getFCMToken = async () => {
	try {
		const token = await getToken(messaging);
		console.log('FCM Token:', token);
		return token;
	} catch (error) {
		console.error('FCM Token 가져오기 실패:', error);
	}
};

// 알림 권한 요청
export const requestUserPermission = async () => {
	const authStatus = await requestPermission(messaging);
	const enabled = AuthorizationStatus.AUTHORIZED || authStatus === AuthorizationStatus.PROVISIONAL;

	if (enabled) {
		console.log('푸시 알림 권한 승인됨');
	}
};

// Background & Quit 상태 알림 수신
setBackgroundMessageHandler(messaging, async (remoteMessage) => {
	console.log('💌 Message handled in the background!', remoteMessage);
});

// foreground 상태 알림 수신
onMessage(messaging, async (remoteMessage) => {
	console.log('💌 messaging ~ remoteMessage:', remoteMessage);

	if (remoteMessage)
		Notification.notification(remoteMessage.notification?.title, {
			onPress: () => {
				// if (remoteMessage.data) Linking.openURL(remoteMessage.data);
			},
		});
});
/* initApplication.ts */
import { getFCMToken, requestUserPermission } from '@/service/firebaseMessaging';
export const initApplication = async () => {
await requestUserPermission();
await getFCMToken();
};/* App.js */
export default function App() {
useEffect(() => {
initApplication();
}, []);
return (
<SafeAreaProvider>
<Notification />
<AppContainer />
</SafeAreaProvider>
);
}- notifee 추가 (선택)
→ notifee는 android에서 알림을 커스텀 할 수 있는 기능을 제공합니다. (ios는 지원되지 않음)
알림 내 사진이나 알림 모양 등 디자인을 변경하는 기능을 지원합니다. (참고 : https://notifee.app/)
아래는 위와 같은 코드에 notifee 설정을 추가한 코드입니다. 참고해주세요.
/* firebaseMessaging.ts */
import notifee, { AndroidImportance, AndroidVisibility, AuthorizationStatus, EventType } from '@notifee/react-native';
import { getApp } from '@react-native-firebase/app';
import { FirebaseMessagingTypes, getMessaging, getToken } from '@react-native-firebase/messaging';
import { Platform } from 'react-native';

const messaging = getMessaging(getApp());

// 알림 권한 요청
export const requestUserPermission = async () => {
	const settings = await notifee.requestPermission();

	if (settings.authorizationStatus === AuthorizationStatus.DENIED) {
		console.log('🚫 User denied permissions request ~ DENIED');
	} else if (settings.authorizationStatus === AuthorizationStatus.AUTHORIZED) {
		console.log('✅ User granted permissions request ~ AUTHORIZED');
	} else if (settings.authorizationStatus === AuthorizationStatus.PROVISIONAL) {
		console.log('🟡 User provisionally granted permissions request ~ PROVISIONAL');
	}
};

// FCM 토큰 가져오기
export const getFCMToken = async () => {
	try {
		const token = await getToken(messaging);
		console.log('🔑 FCM Token succeed:', token);
		return token;
	} catch (error) {
		console.error('❌ FCM Token failed:', error);
	}
};

// Background & Quit 상태 알림 수신 - ios
notifee.onBackgroundEvent(async ({ type, detail }) => {
	if (type === EventType.PRESS) {
		console.log('💌 Background notification pressed:', Platform.OS, detail.notification);
	}
});

// Foreground 상태 알림 수신
notifee.onForegroundEvent(({ type, detail }) => {
	if (type === EventType.PRESS) {
		console.log('💌 Foreground notification pressed:', detail.notification);
	} else if (type === EventType.DELIVERED) {
		console.log('💌 Notification delivered in foreground:', detail.notification);
	}
});

// Foreground 메시지 수신 핸들러 등록
export const registerForegroundMessageHandler = () => {
	return messaging.onMessage(async (remoteMessage) => {
		console.log('💌 Foreground message received:', remoteMessage);
		await onDisplayNotification(remoteMessage);
	});
};

export const onDisplayNotification = async (remoteMessage: FirebaseMessagingTypes.RemoteMessage) => {
	try {
		const { data } = remoteMessage;
		const channelId = await notifee.createChannel({
			id: 'default',
			name: '기본 알림',
			importance: AndroidImportance.HIGH,
			visibility: AndroidVisibility.PUBLIC,
		});

		await notifee.displayNotification({
			title: remoteMessage.notification?.title,
			body: remoteMessage.notification?.body,
			data,
			android: {
				channelId,
				importance: AndroidImportance.HIGH,
				visibility: AndroidVisibility.PUBLIC,
			},
		});
	} catch (err) {
		console.error('❌ catch error: ', err);
	}
};
/* index.js */
import { AppRegistry, Platform } from 'react-native';
import App from './App';
import { name as appName } from './app.json';
import { getMessaging } from '@react-native-firebase/messaging';
import { onDisplayNotification } from './app/service/firebaseMessaging';
import { getApps } from '@react-native-firebase/app';
// Background & Quit 상태 알림 수신 - android
const messaging = getMessaging(getApps());
messaging.setBackgroundMessageHandler(async (remoteMessage) => {
console.log('💌 Background notification pressed:', Platform.OS, remoteMessage);
return await onDisplayNotification(remoteMessage);
});
AppRegistry.registerComponent(appName, () => App);/* App.tsx */
function App(): React.JSX.Element {
useEffect(() => {
const setupFirebase = async () => {
try {
await requestUserPermission();
await getFCMToken();
return registerForegroundMessageHandler();
} catch (error) {
console.error('Firebase initialization error:', error);
return undefined;
}
};
const unsubscribePromise = setupFirebase();
return () => {
unsubscribePromise.then(unsubscribe => unsubscribe?.());
};
}, []);
return (
// 생략
);
}
export default App;FCM Token Push test
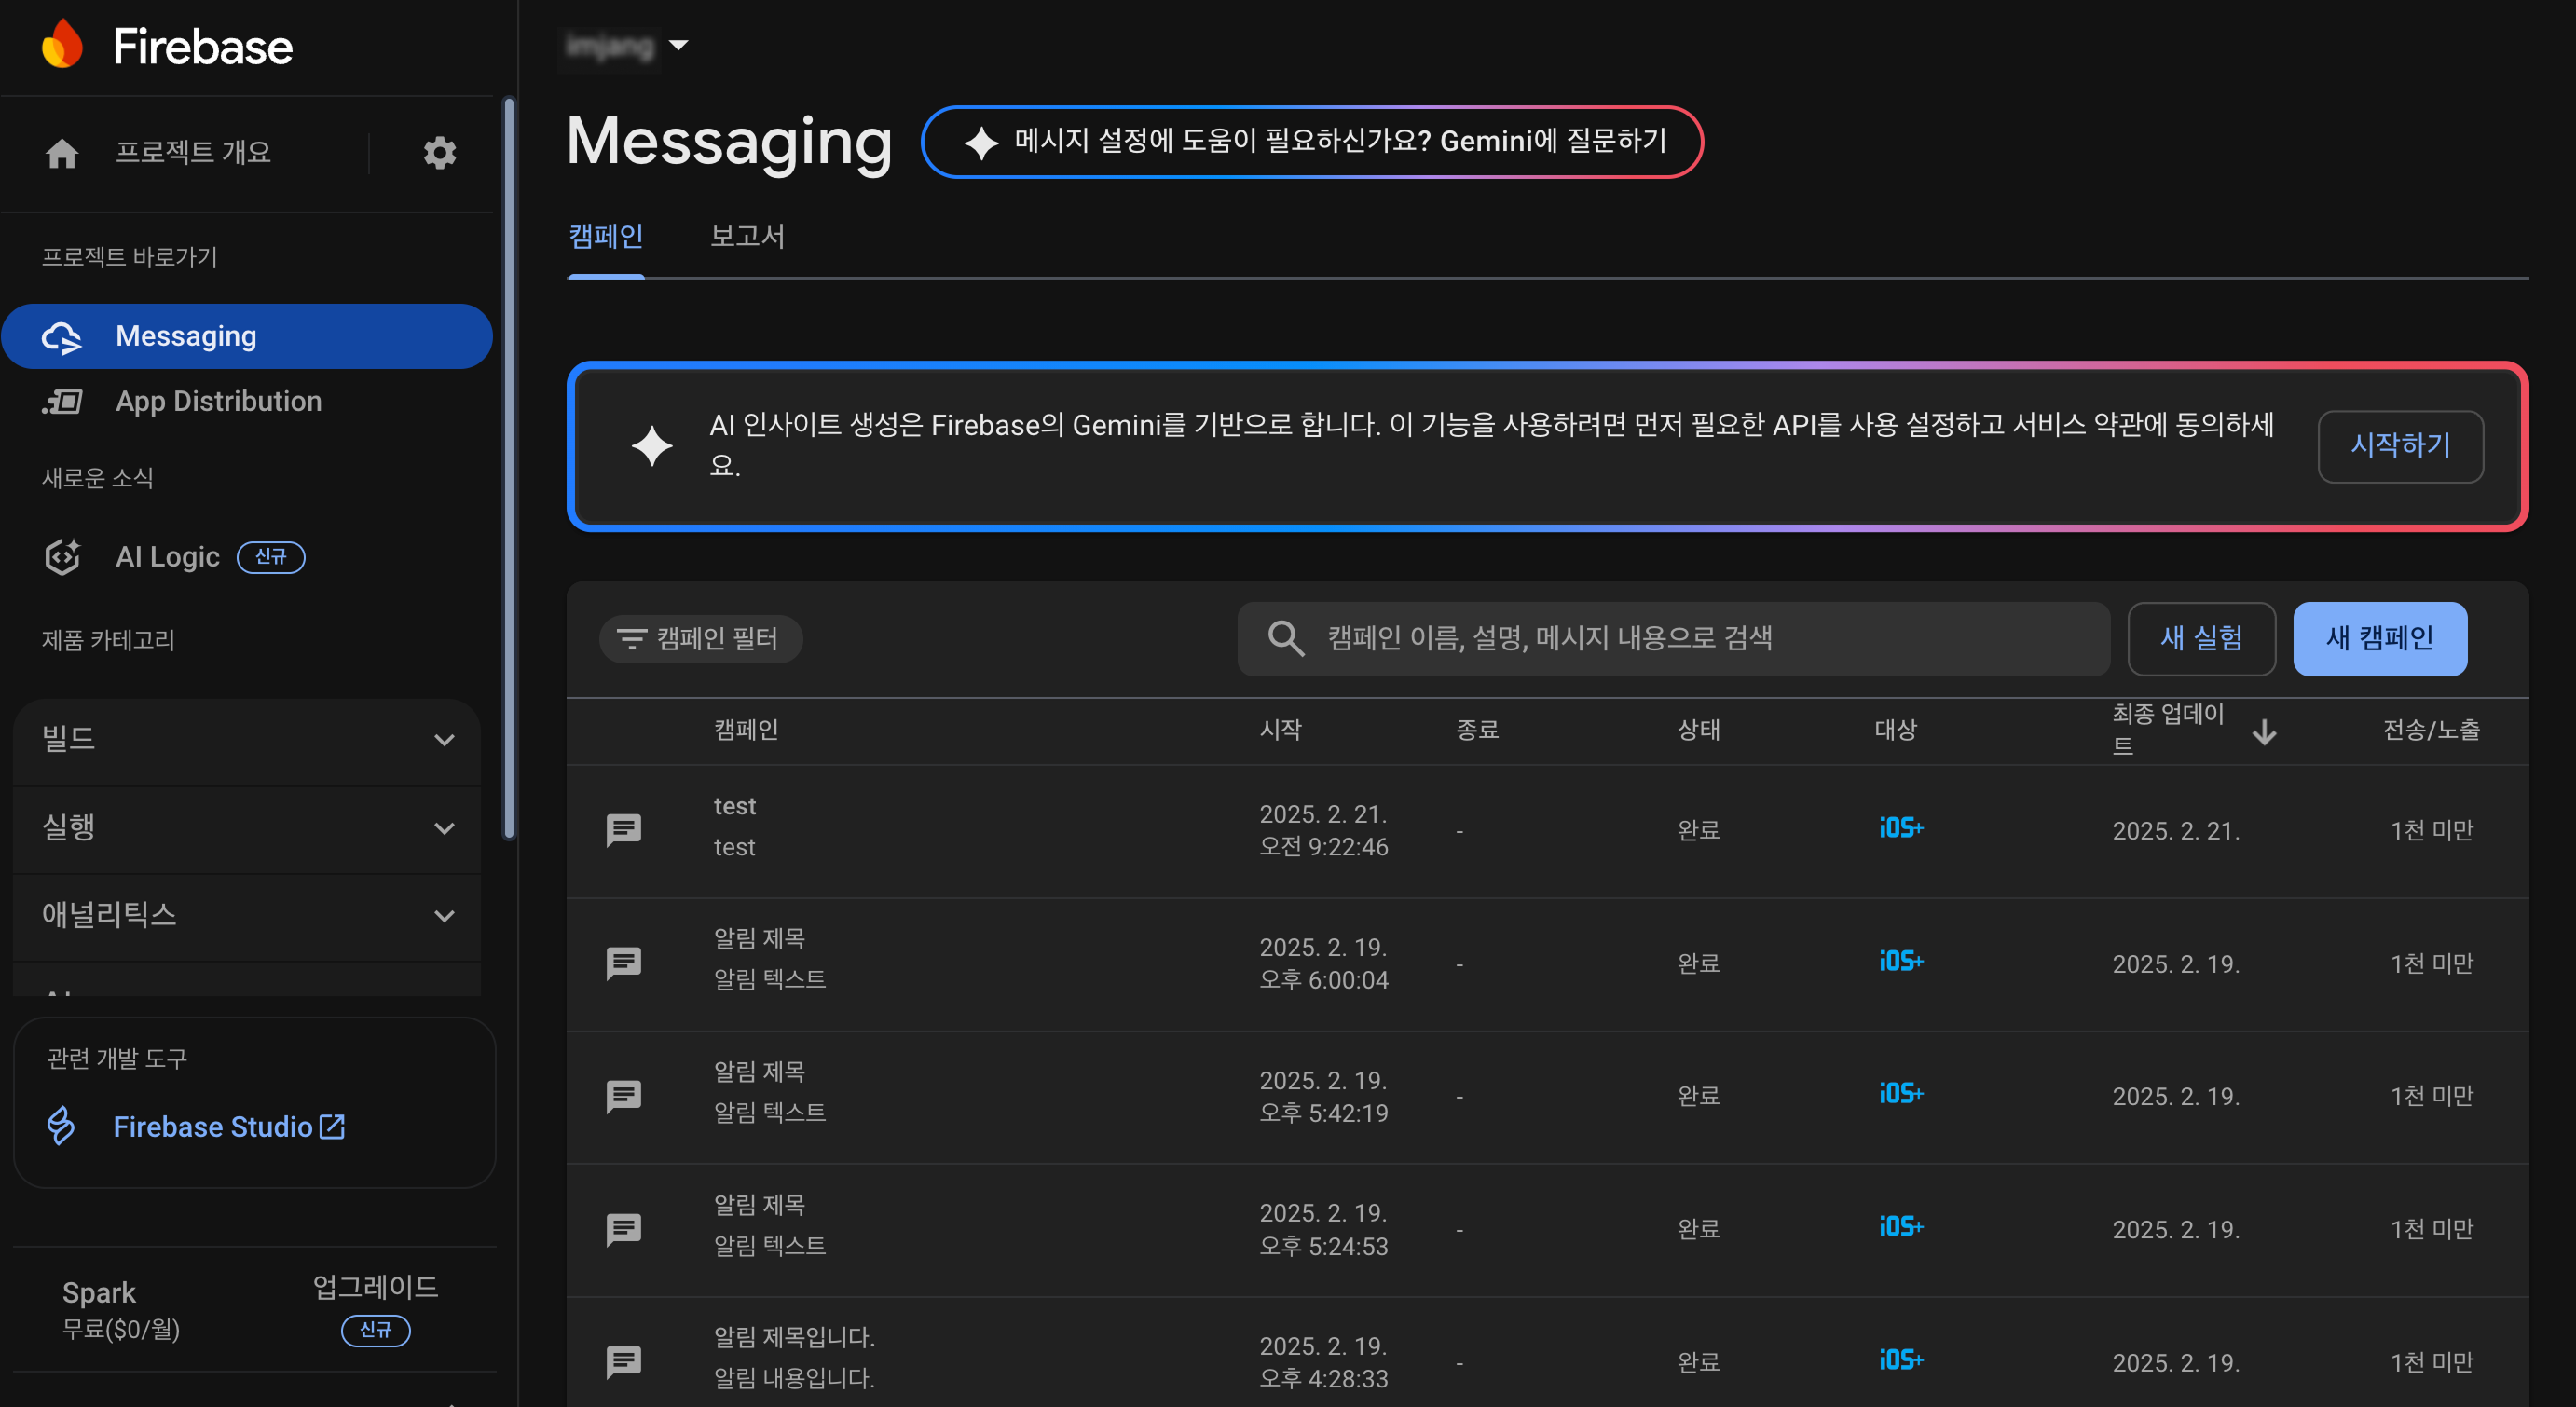
위와 같이 설정 후 getFCMToken 해당 함수로 받은 토큰을 가지고 있다가, firebase > Messaging에서 테스트 해볼 수 있는데요.
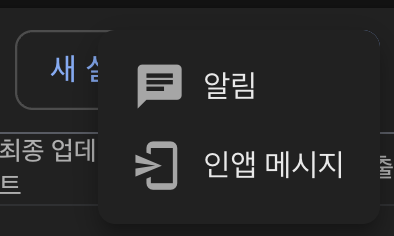
새 캠페인 버튼 > 알림을 클릭해주면 아래와 같은 화면이 나옵니다.
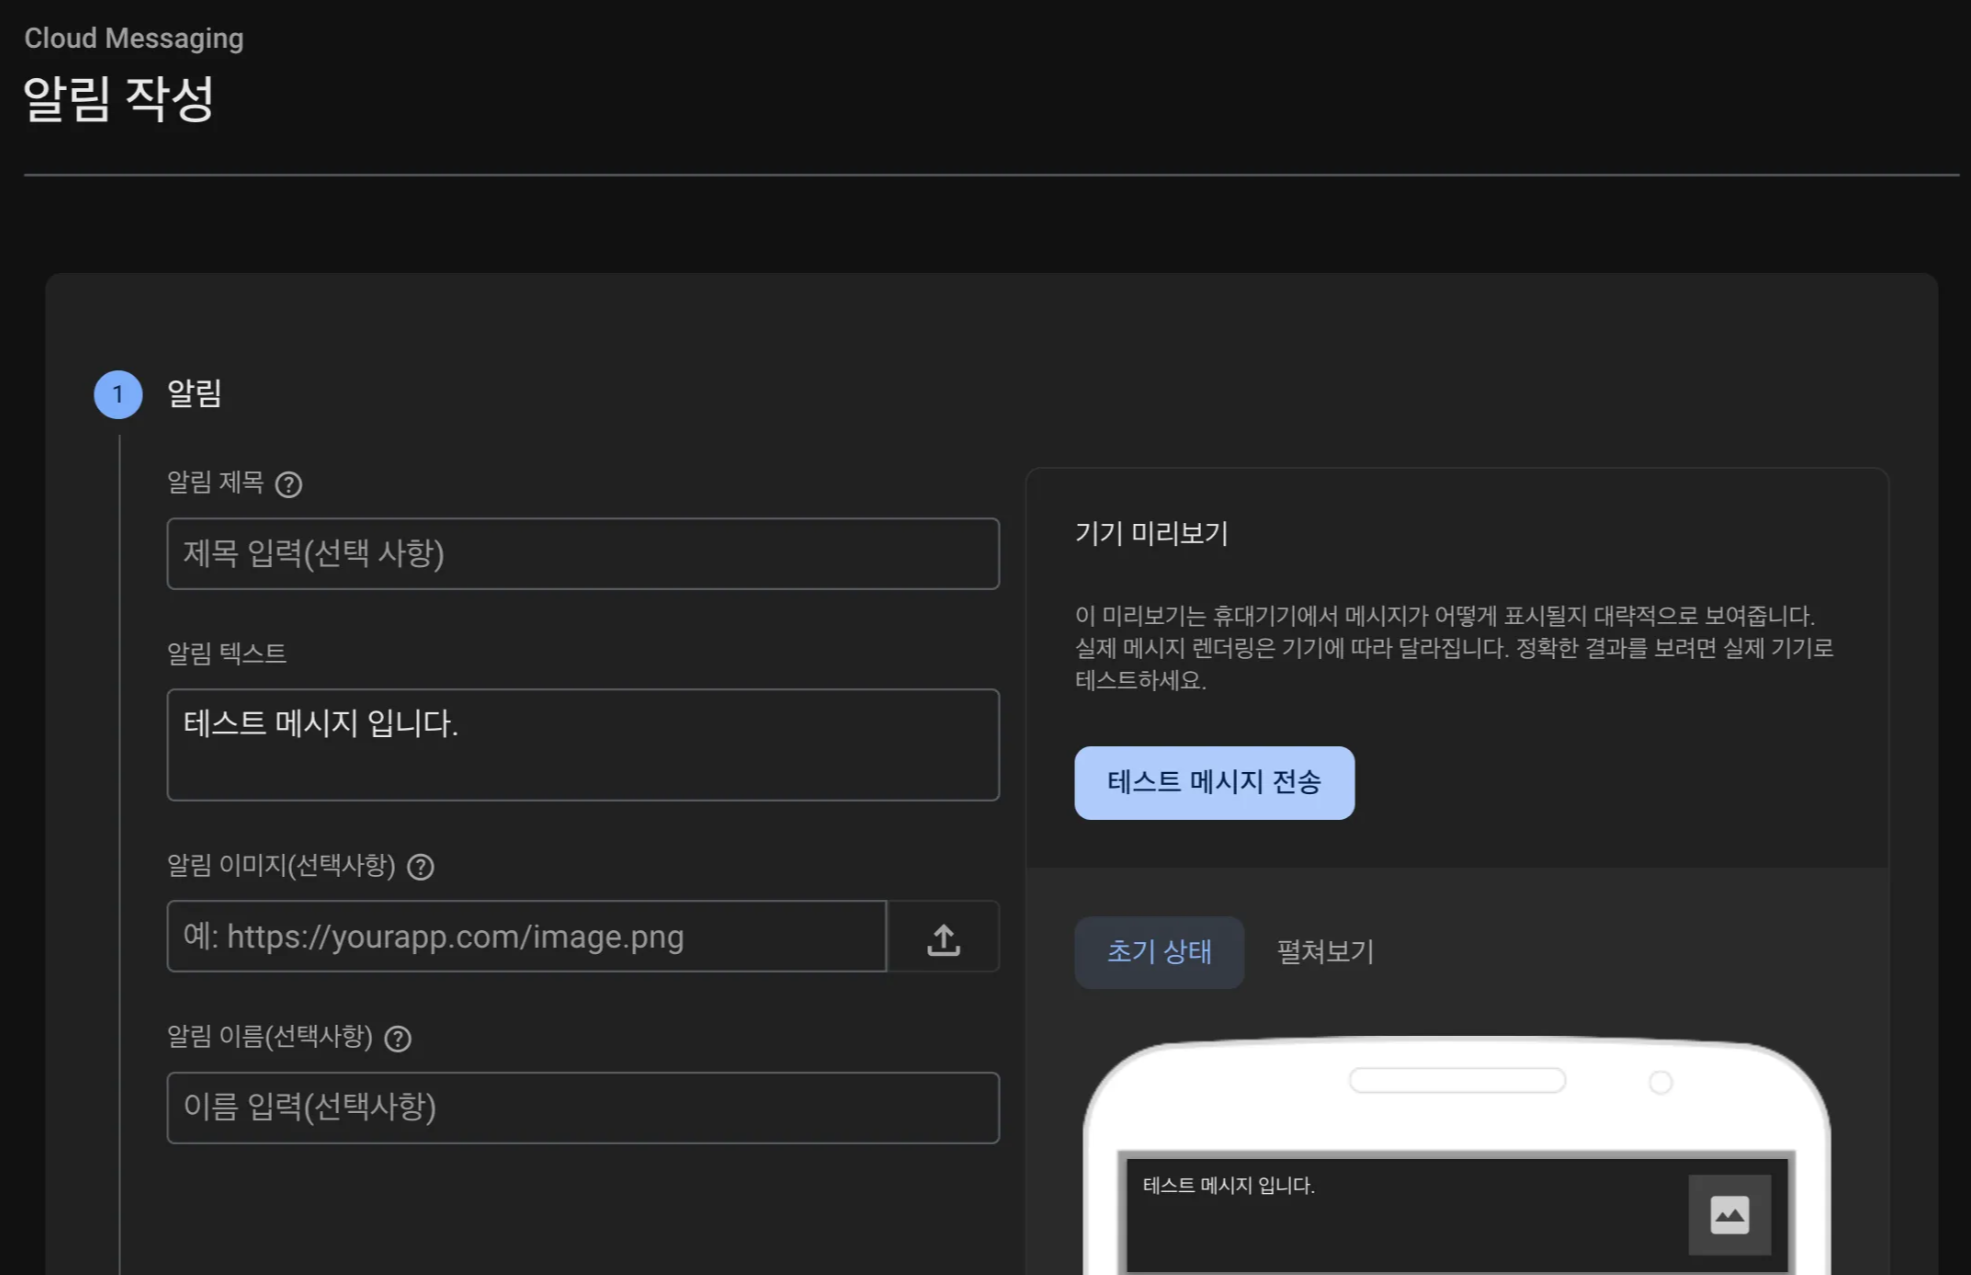
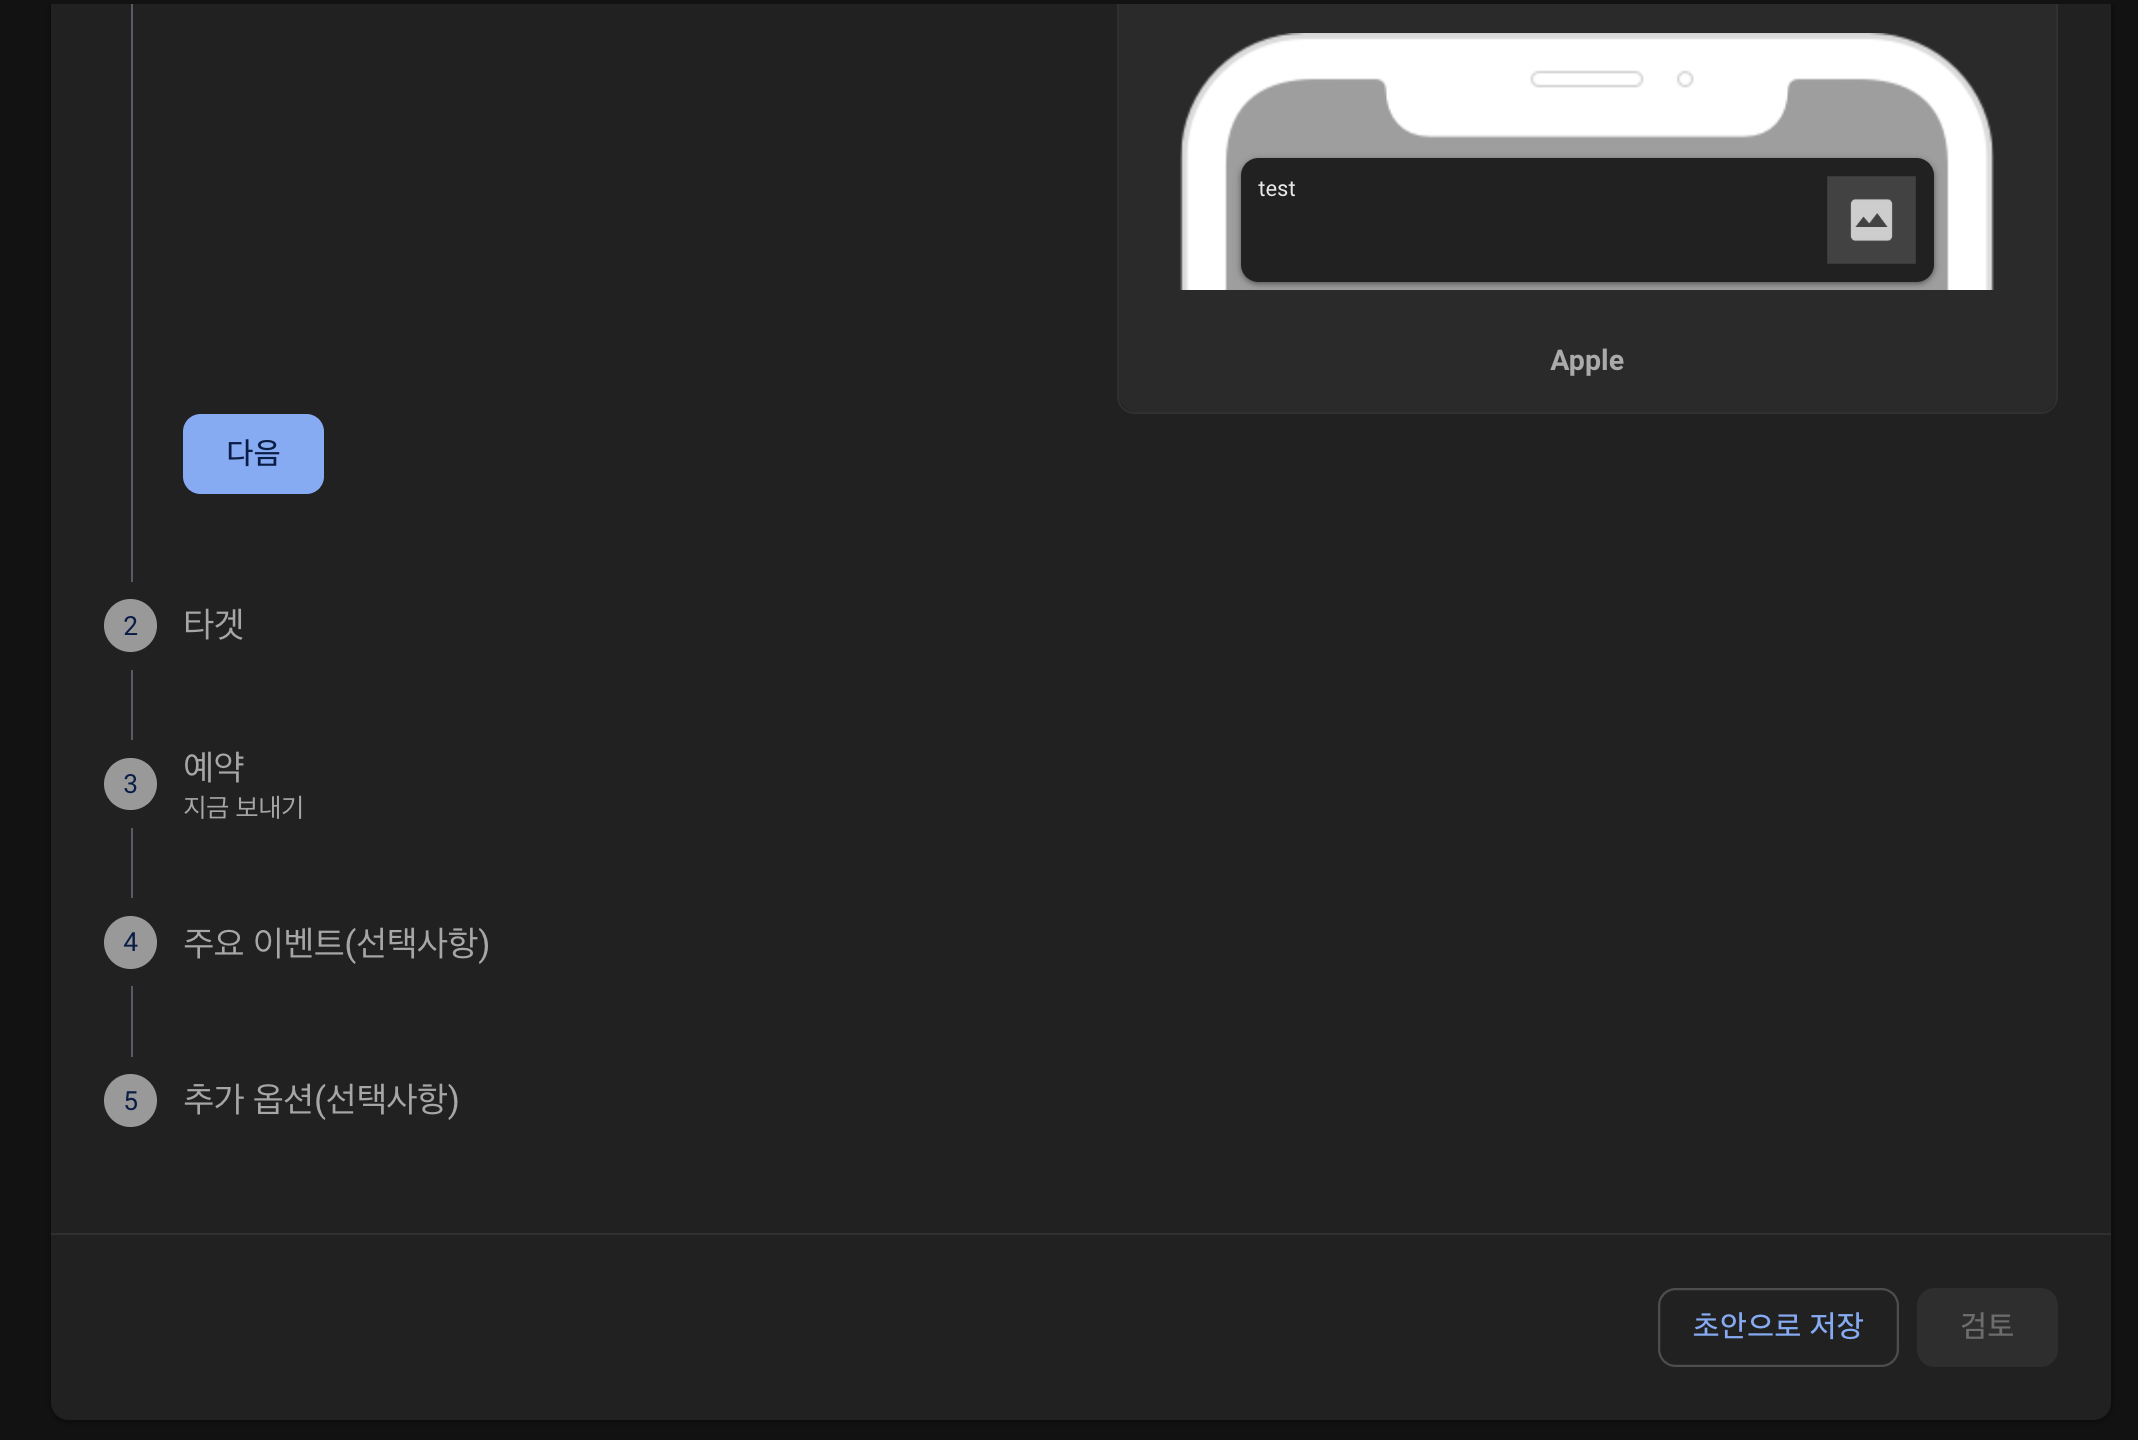
필수값인 알림 텍스트를 작성해준 후, 테스트 메시지 전송을 클릭해주면 나의 FCM 토큰을 넣어서 테스트 해볼 수 있습니다.
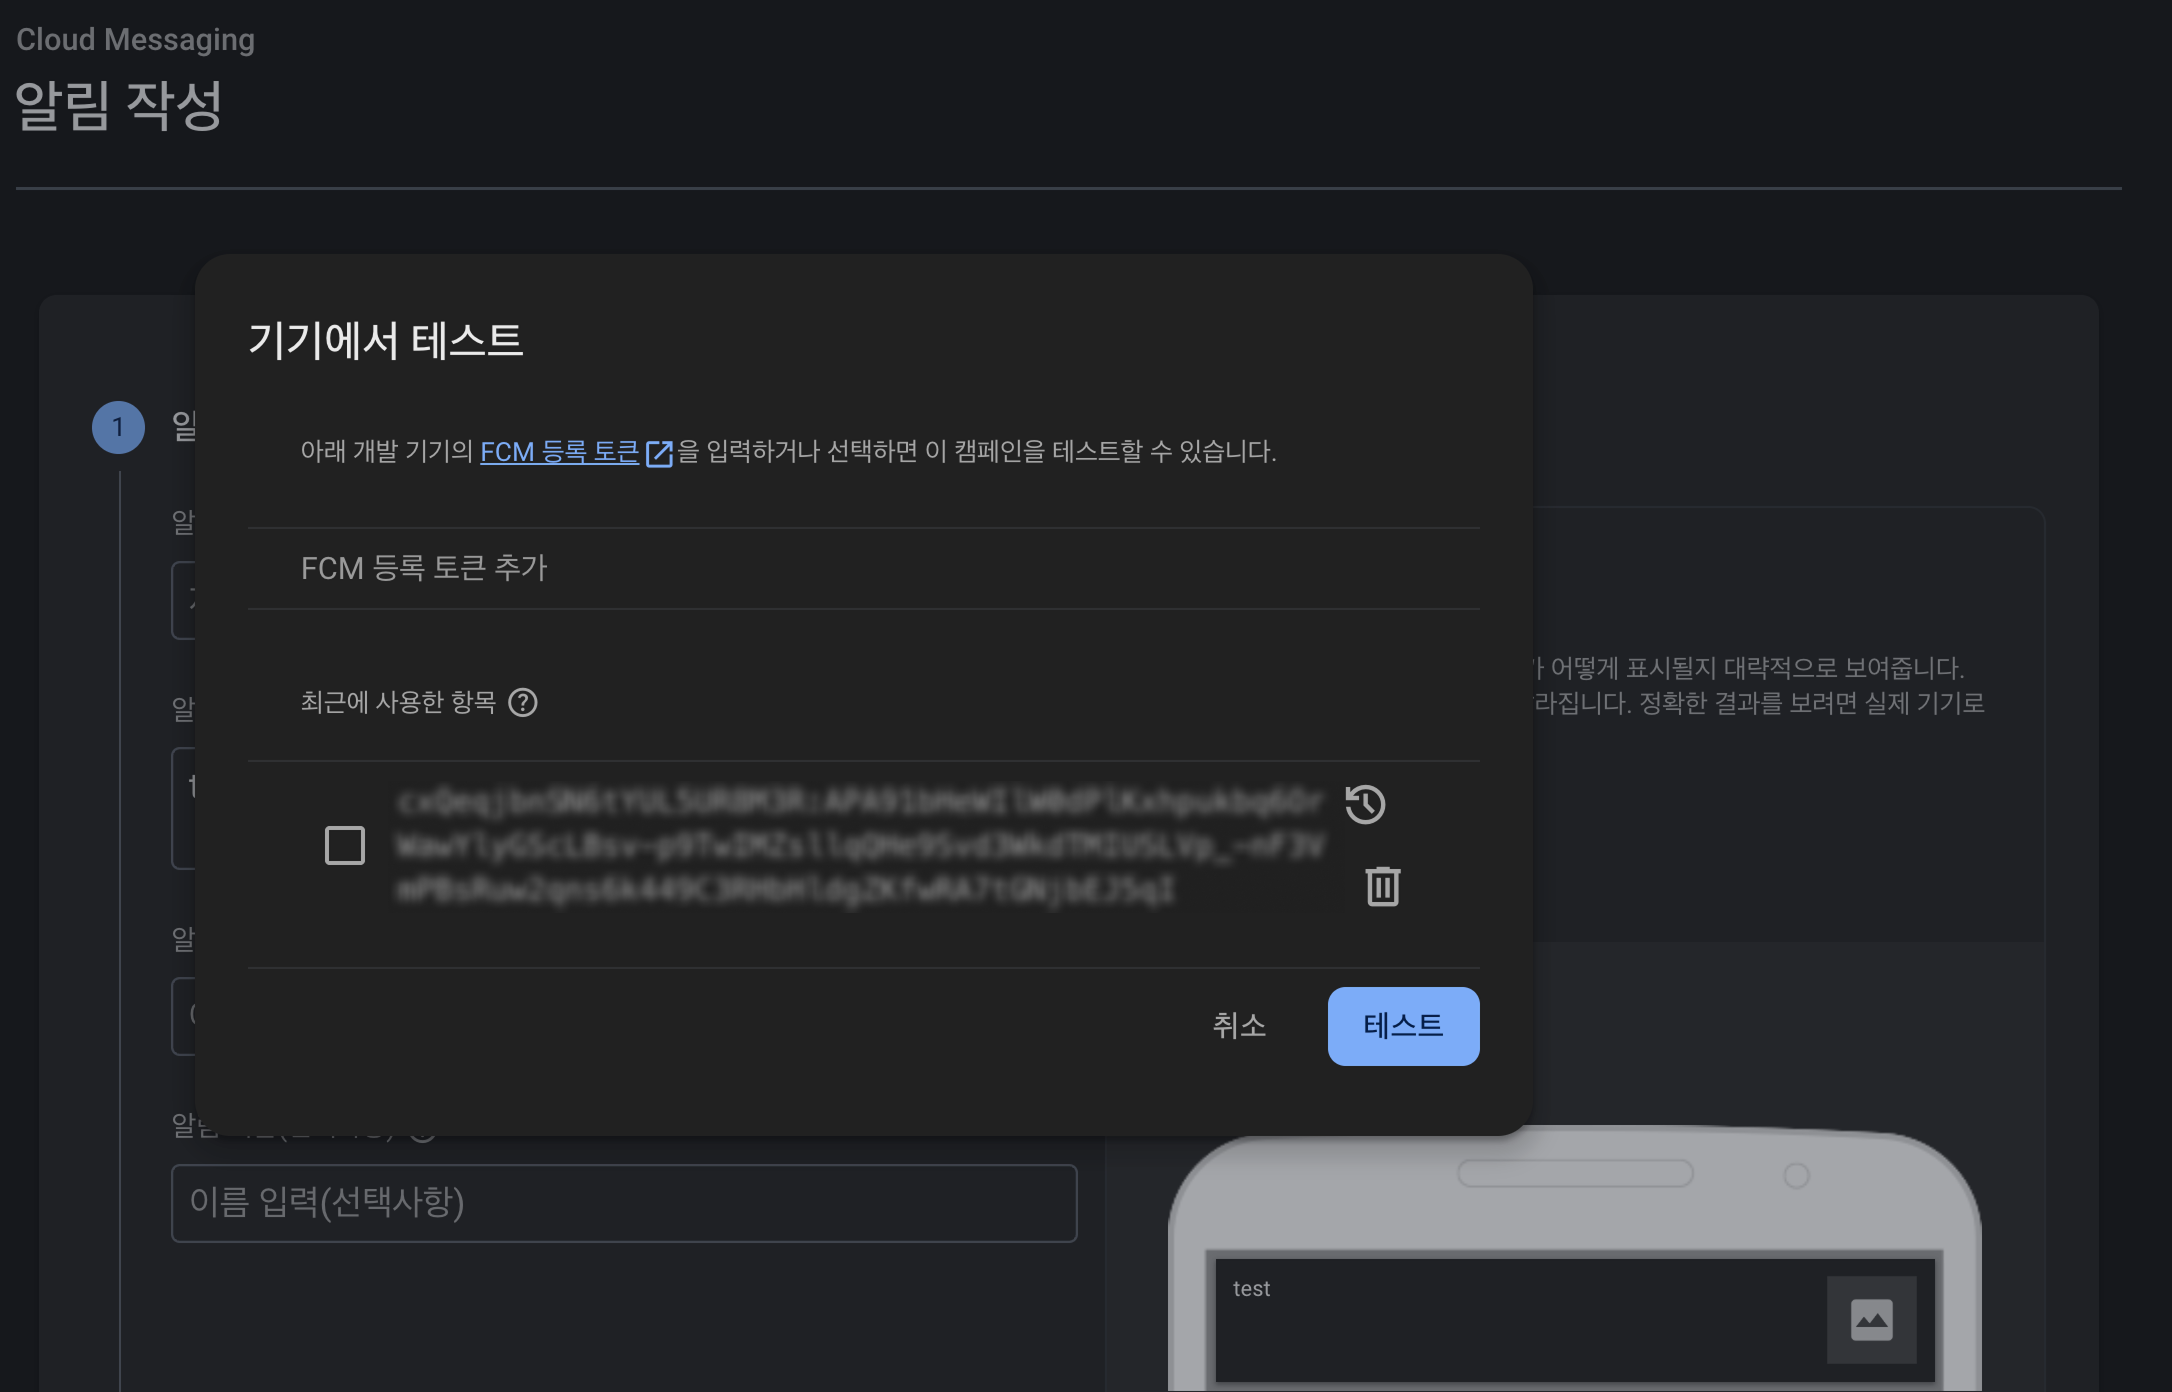
발급 받은 나의 FCM 토큰을 추가해서 테스트 버튼을 클릭해주면, 나의 앱에서 작성한 알림 메시지로 푸시 메시지가 오는 것을 확인 할 수 있습니다.
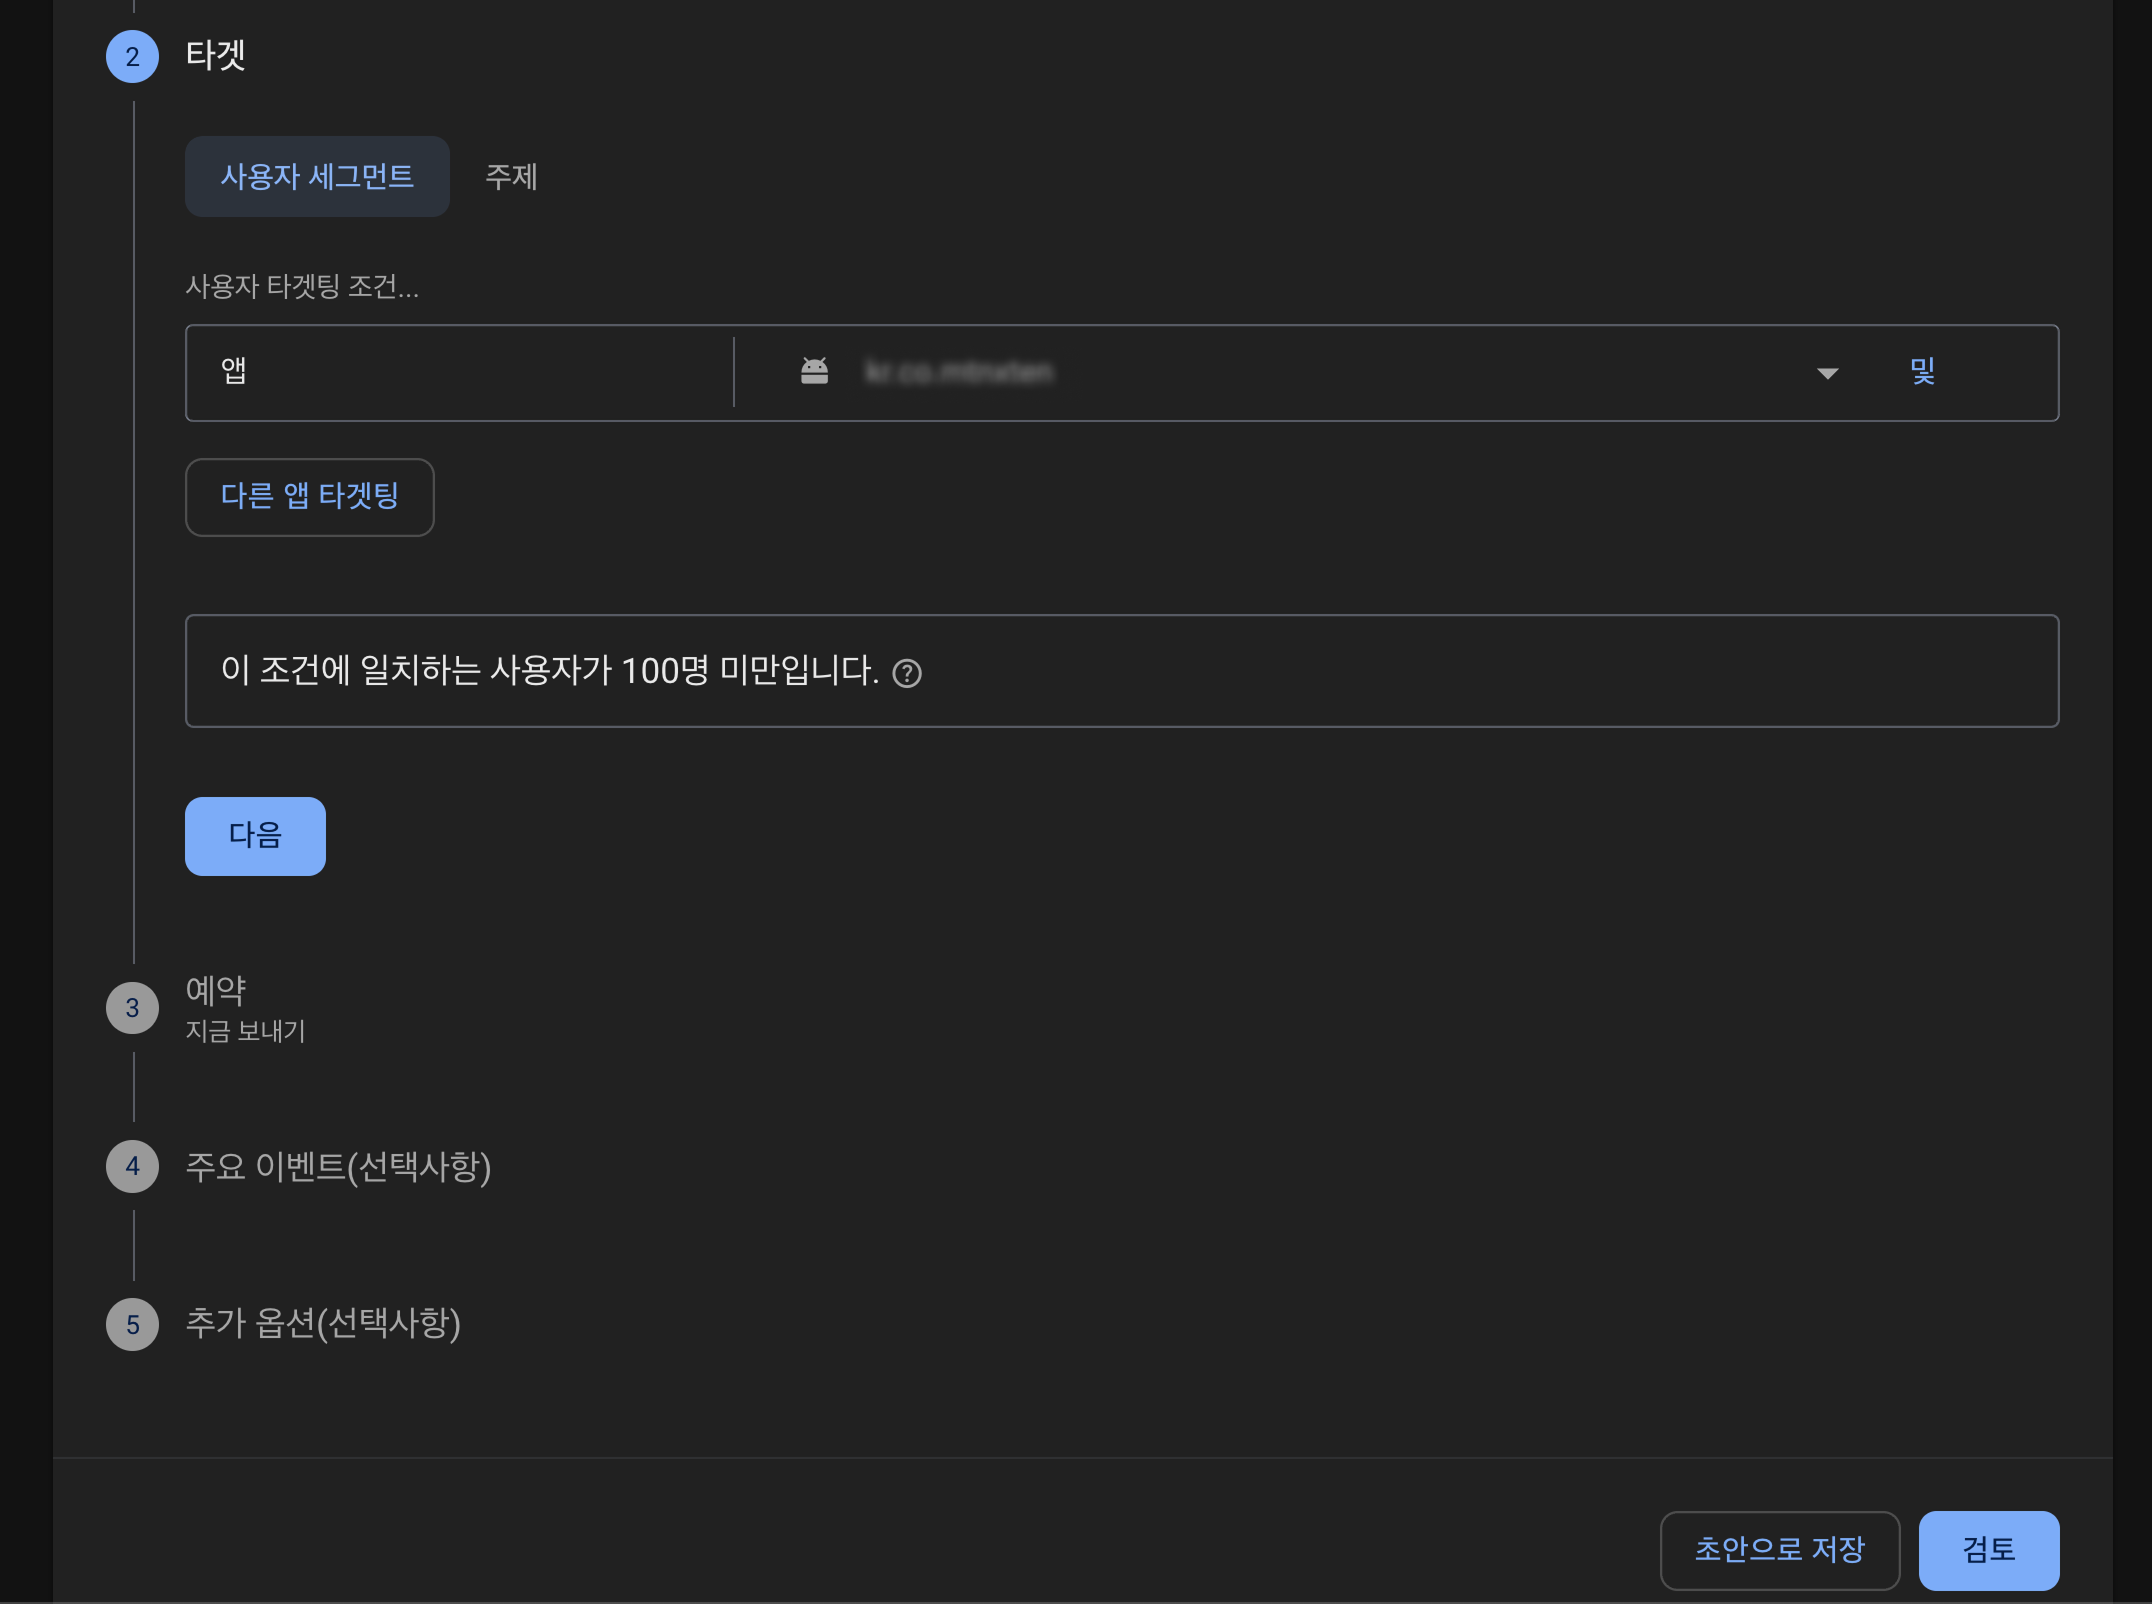
추가로 ios, android 타켓을 정해서 전체 메시지를 보낼 수도 있습니다.
이렇게 firebase messaging을 설정하는 방법과, 푸시 알림을 보내는 방법에 대해서도 알아보았는데요.
푸시 알림 처음엔 잘 모르니 걱정이 있었는데, firebase로 설정 하고보면 생각보다 간단하고 쉽더라구요.

Tags: